WORKSHOP
- How to re-shaft a pre-1935 steel shafted wood
- How to re-pin an iron
- How to straighten a warped shaft
- How to finish a new hickory shaft
- How to re-grip a club
(information provided by Qld AGHS member Ross Haslam)
1. How to re-shaft a pre-1935 steel shafted wood
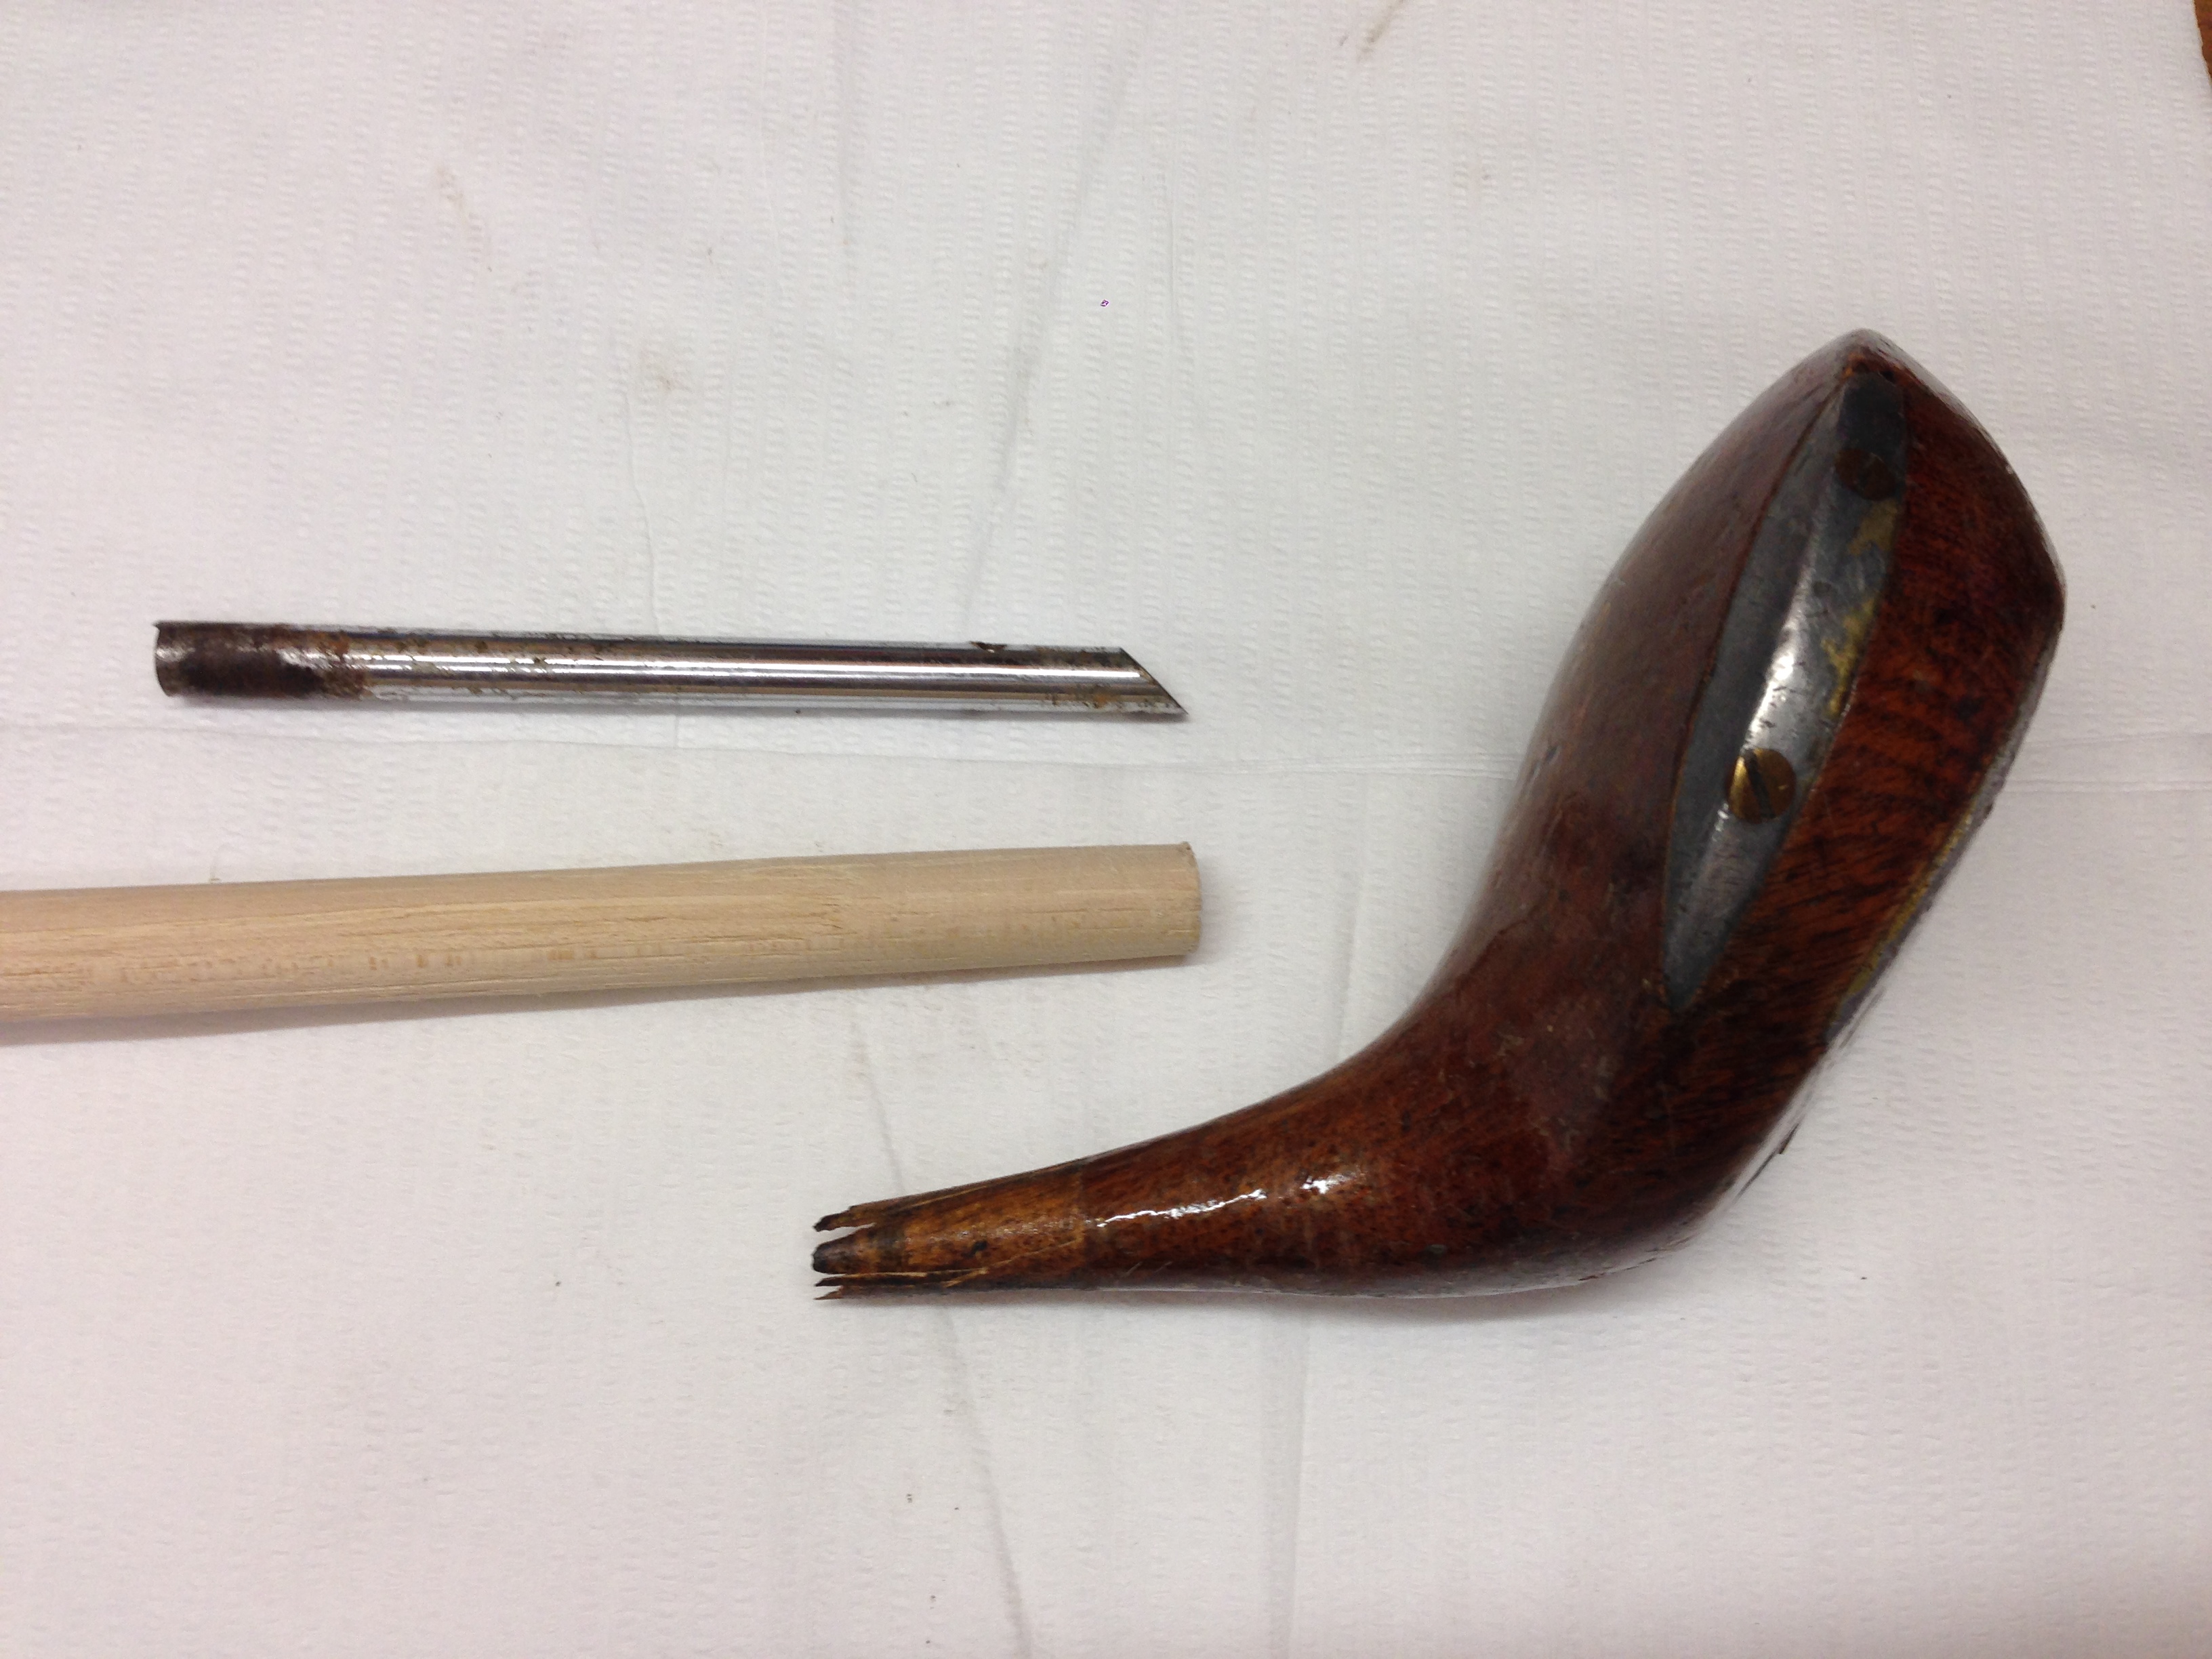
Once you have your pre-1935 wood the first step, and usually the most difficult in the entire process, is to carefully remove the steel shaft without causing too much damage to the wood head.
The steel shaft of most pre-1935 steel shafted clubs was held in with 2 screws. The first is usually a longer screw, approx 30mm long, runs perpendicular to the hosel of the club passing through the shaft and securing it into the clubhead. The second is a shorter screw approx 15mm long that skews back into the clubhead through the shaft where it penetrates out of the base of the club. On occasion you may find this screw is actually a pin that has been nailed through the shaft (these are difficult to get out). The other variation you may see, particularly in latter clubs, is that the screw through the hosel may have a very small head (making it very hard to extract) or may not have been used at all.

Removing screws that have been in place for 80+ years can be a trying experience. They are nearly always slotted screws that are filled with dirt and other gunk and are often worn away leaving little slot for a screwdriver to fit into. A pair of loupes is essential for examining the condition of the slot and determining the angle that it is screwed into the club. I use a Stanley knife blade to clean the slot as thoroughly as possible and make sure that I have a screwdriver that fits the slot snuggly. You need to ensure the shaft of the screwdriver runs parallel with the angle that the screw has been inserted into the club and that pressure is exerted directly down the shaft, you only get one go to get these screws out. If not the blade can twist out of the slot and damage it to a point where you will be unable to apply any pressure to remove the screw.
If they refuse to budge (and they often do) I drill them out from the base with a bit that just fits into the hollow centre of the shaft. After drilling up through the shaft the head of the hosel screw usually sticks up enough to grab with a pair of pincers or fine pliers. Remember that the end of both screws will both need to be punched into the clubhead to clear the inner wall of the steel shaft. Once they have been punched clear the shaft should turn freely and can be pulled out. If the shaft doesn’t turn freely chances are one or both of the screws will not have been punched clear of the shaft.
On rare occasions you may stumble across a club that has been previously re-shafted with a new steel shaft. These shafts are virtually impossible to remove and difficult to identify. The only real indicator is the age of the shaft compared to the head. Most of the clubs I retro fit are pre-1935 when pyratone was very much the norm for wood shafts. A shiny steel "True Temper" or similar shaft may be a give away for those clubs that have been updated during the 40's or 50's with a new steel shaft. These "newer" steel shafts are usually glued in place and are not worth the effort in trying to remove.
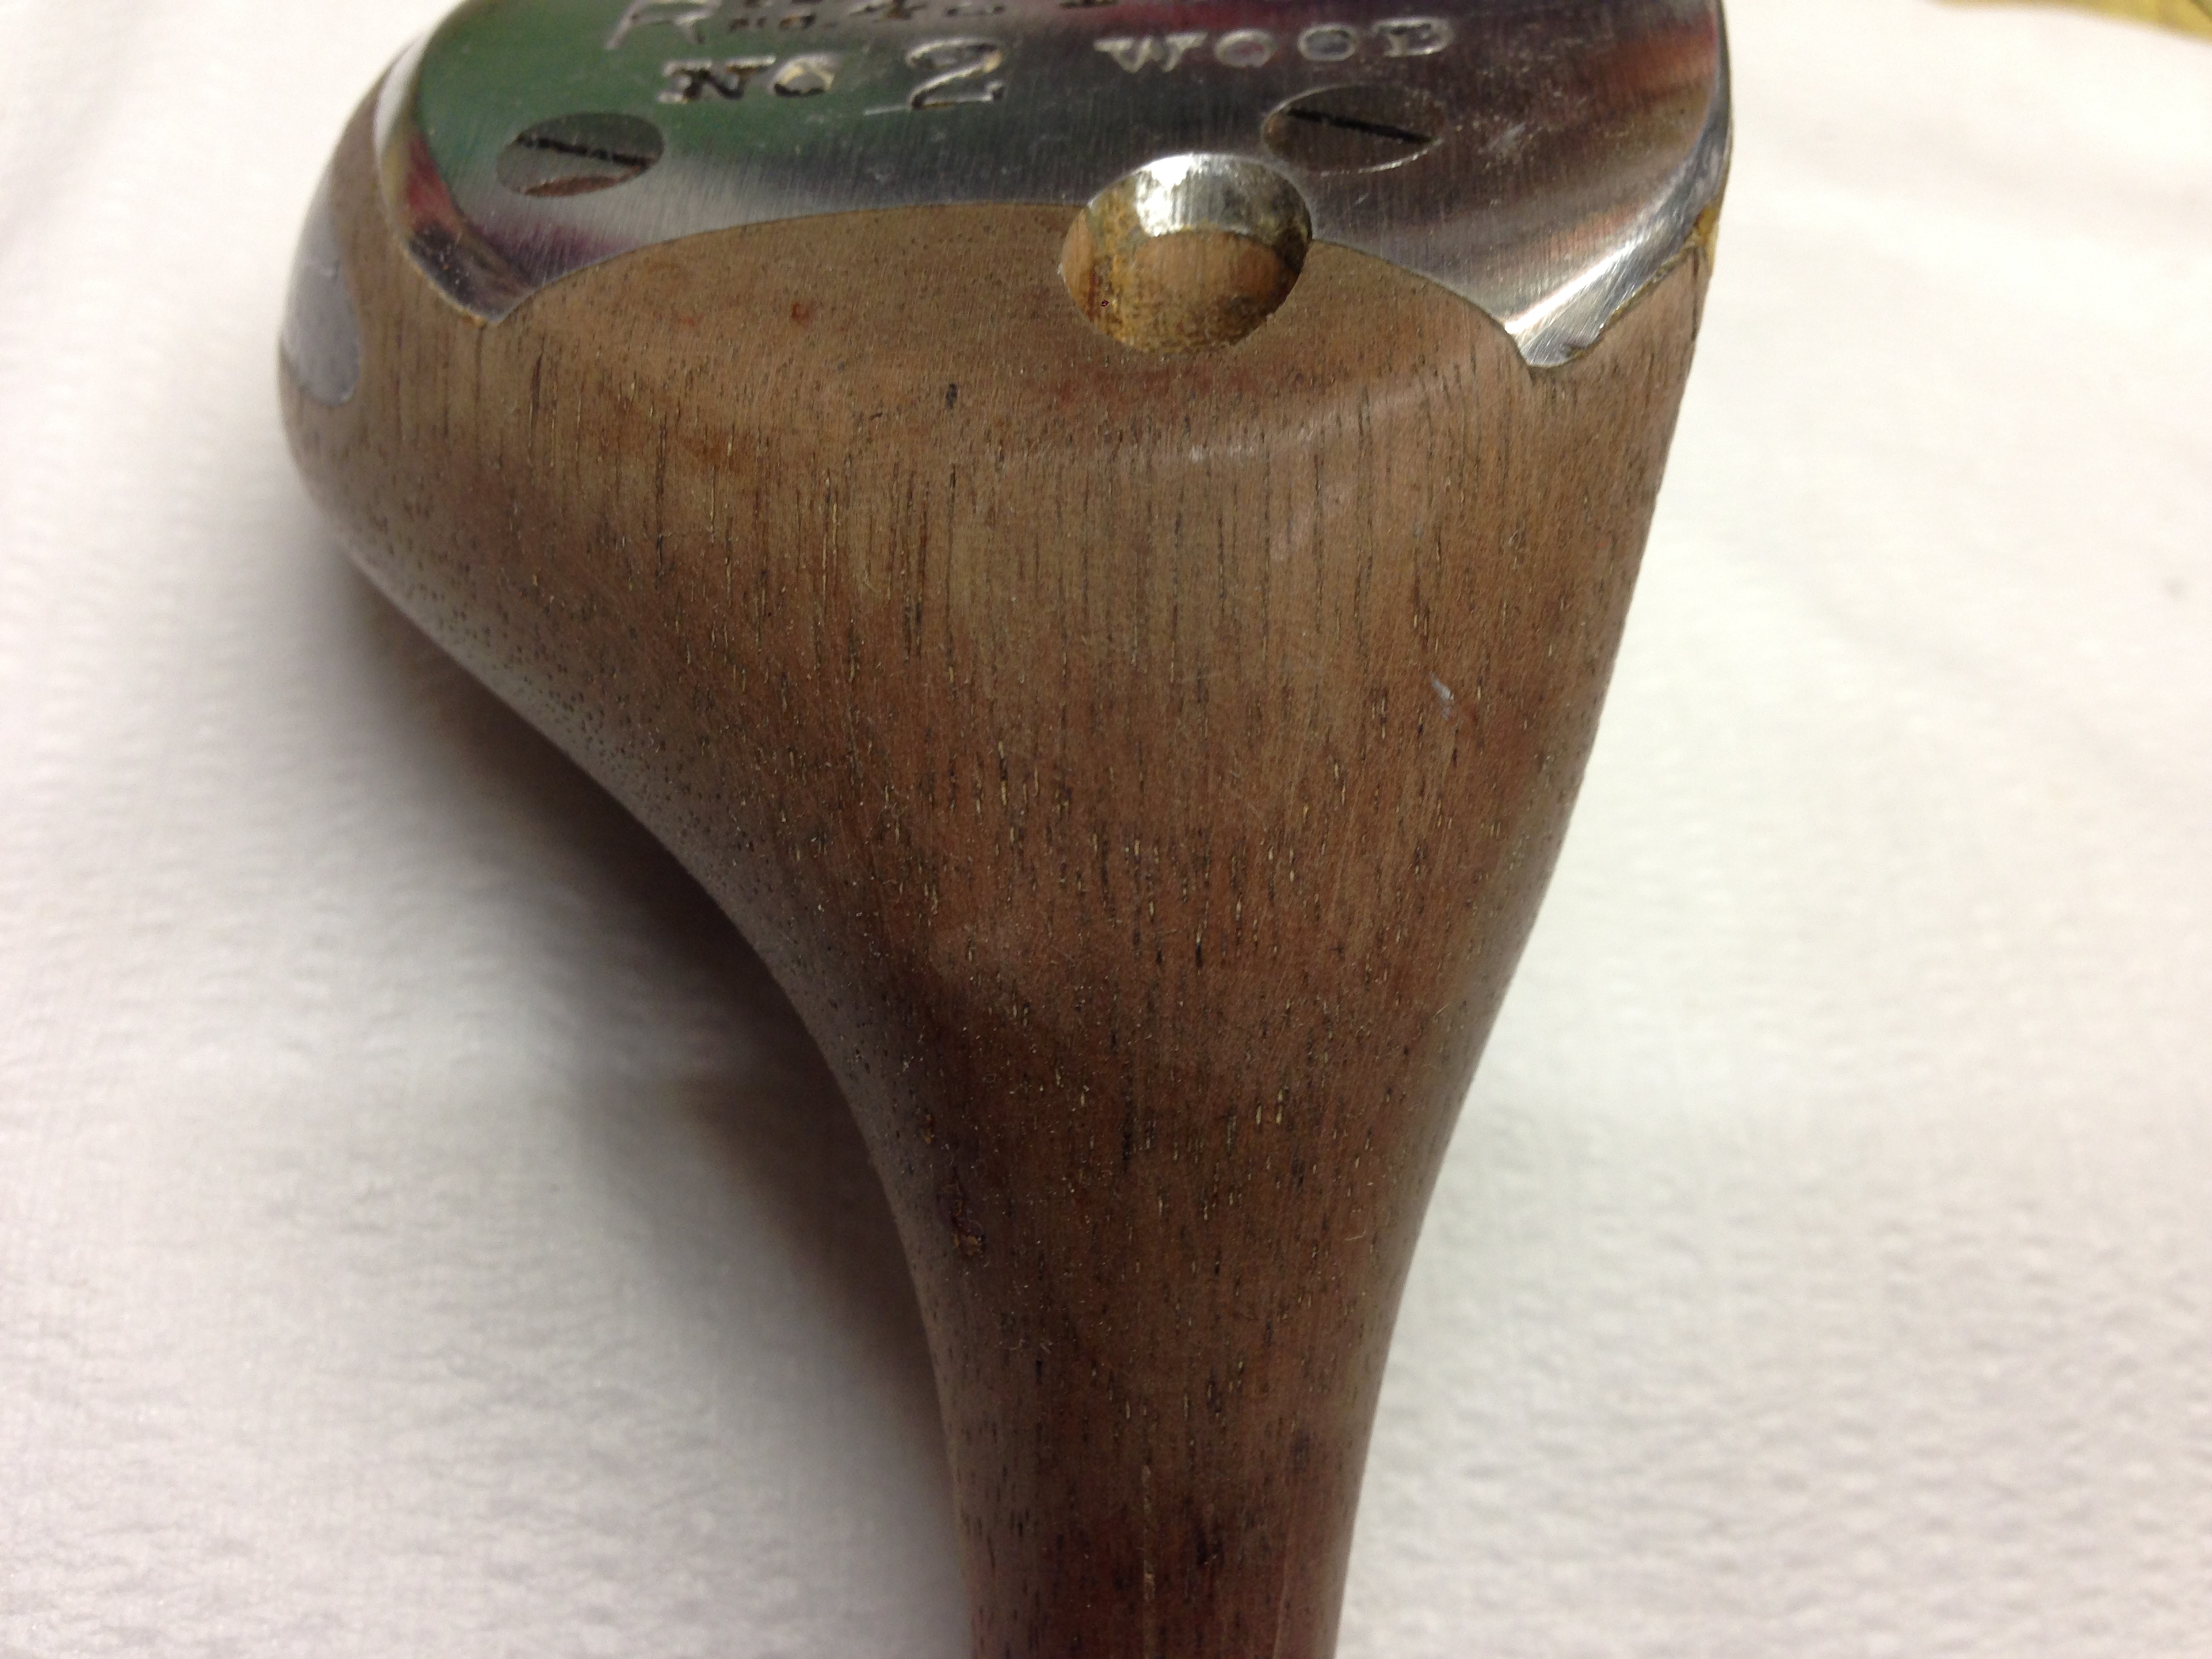
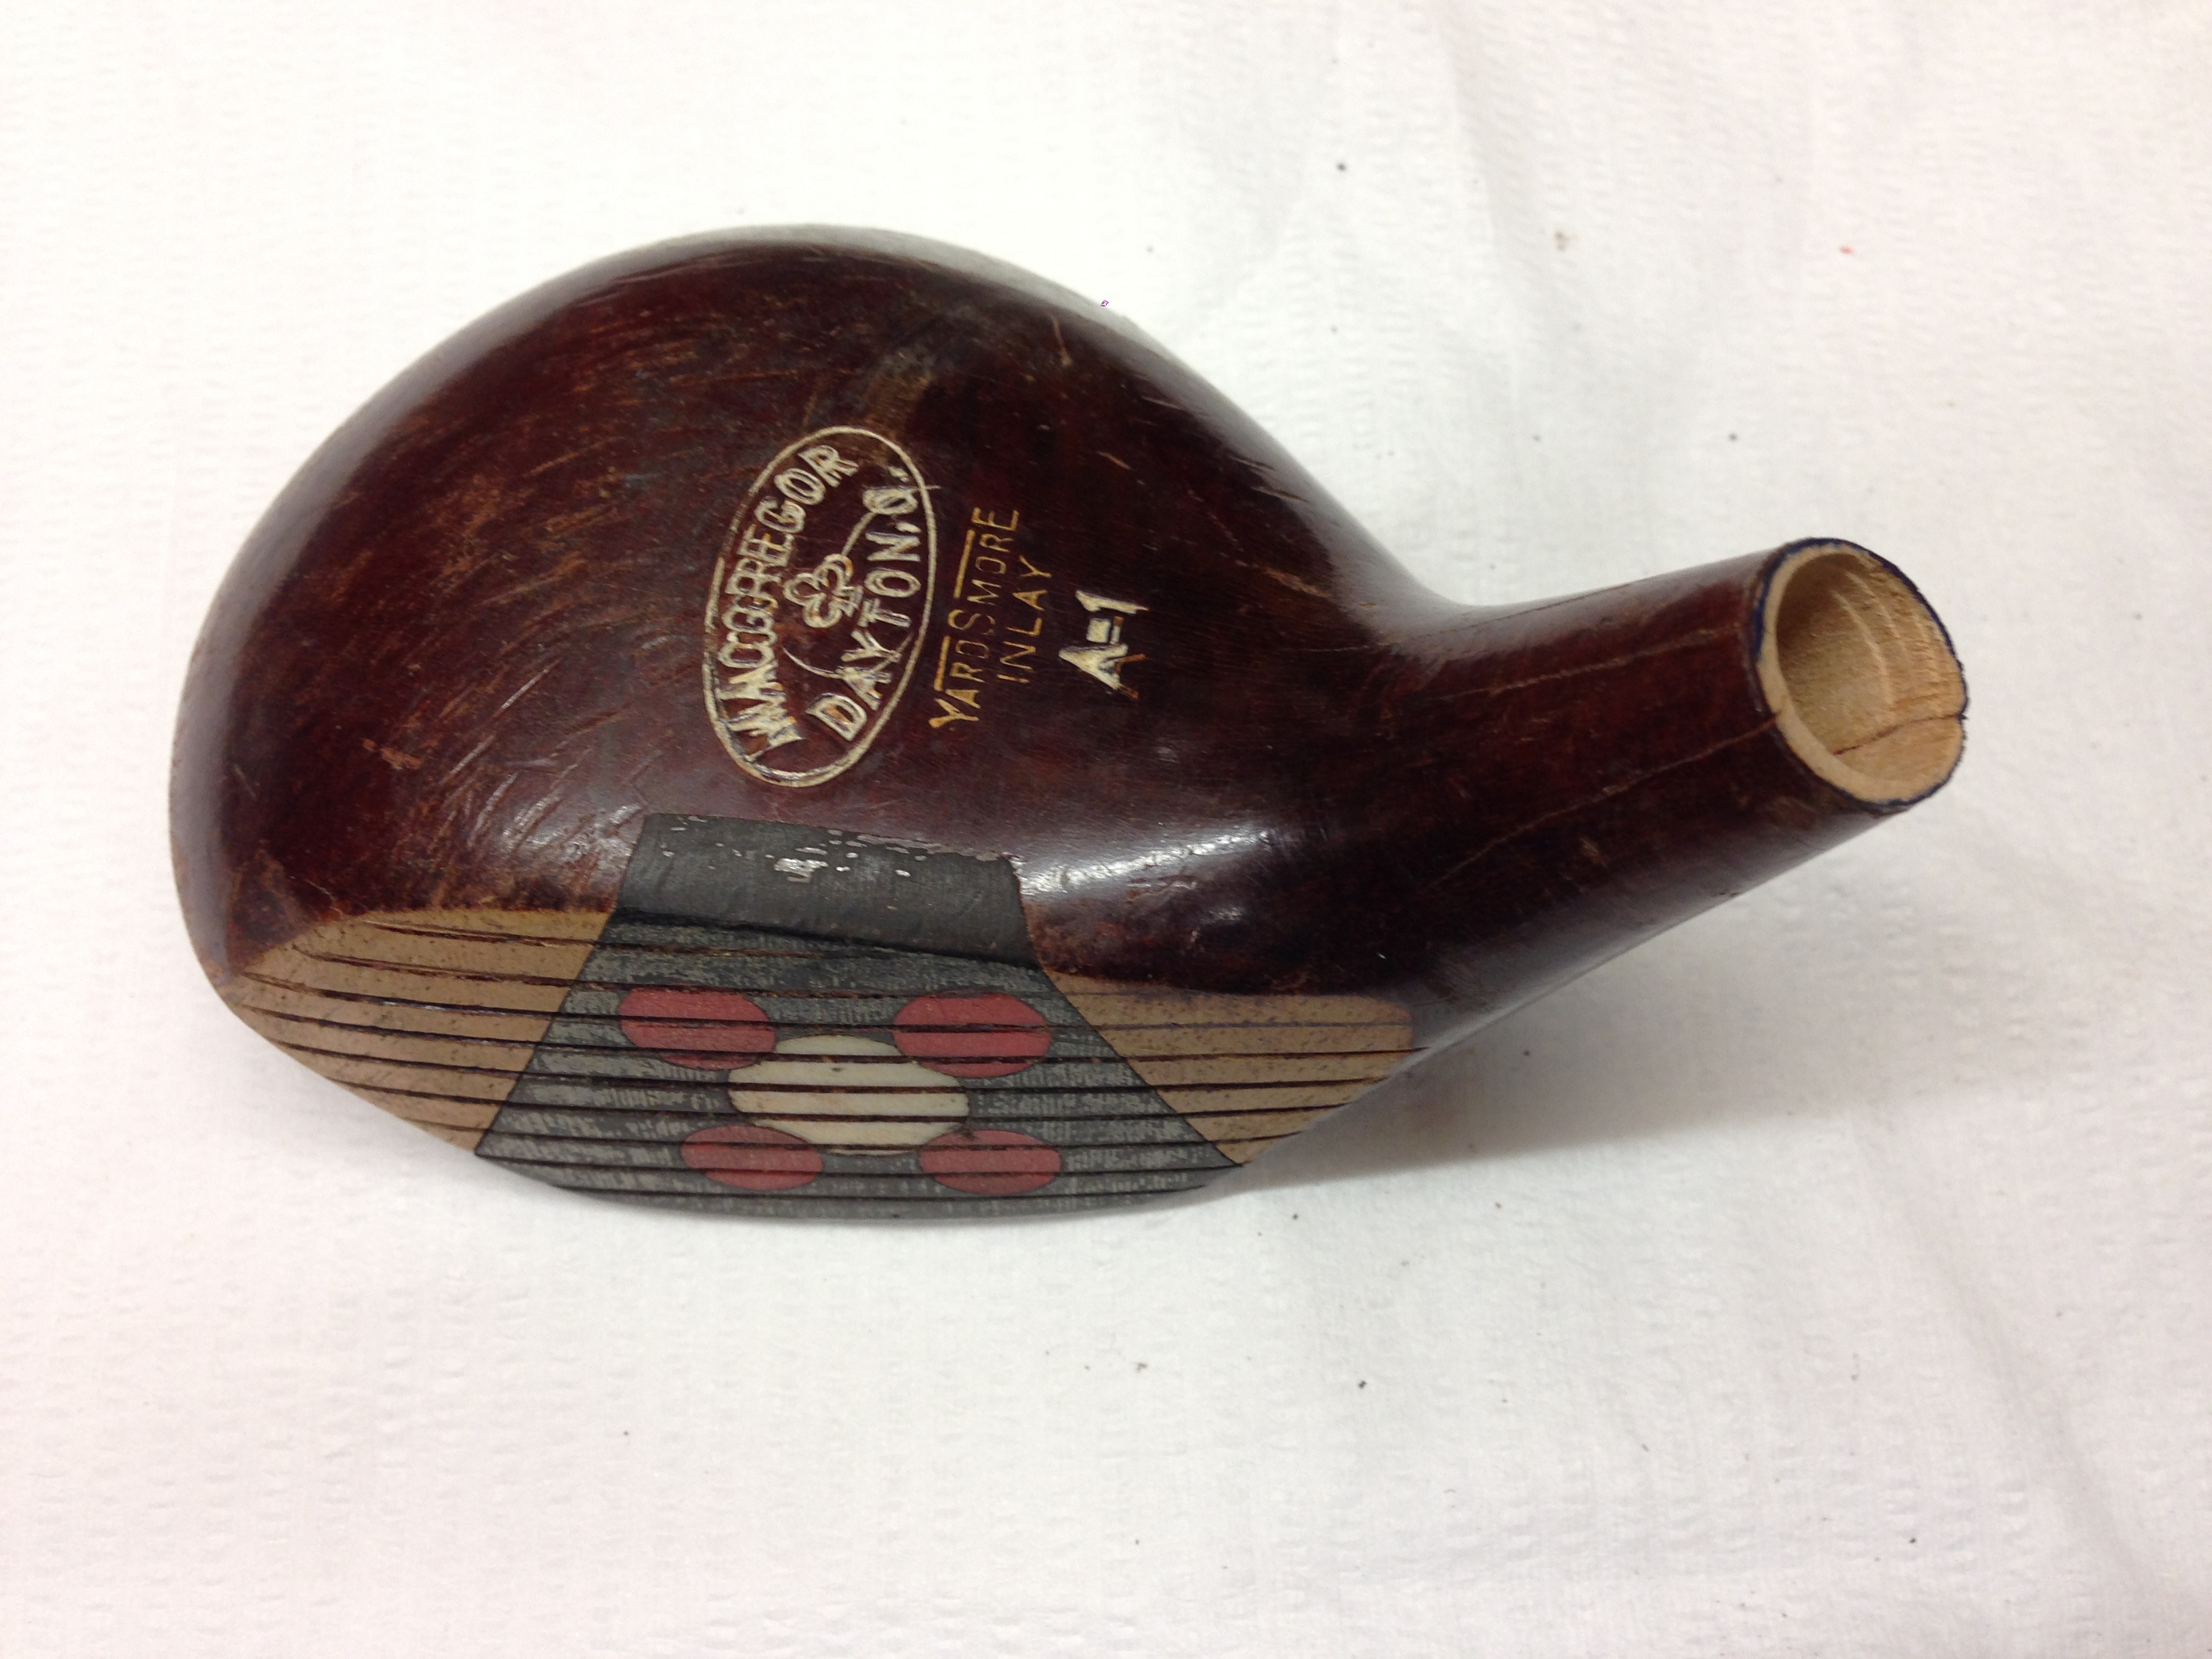
The remaining clubhead can now be trimmed and bored out ready for fitting of the new hickory shaft. I cut the hosel at the point where the width of the hosel will match the diameter of the new hickory shaft. Because the hosel of a steel shafted wood is narrower where it meets the steel shaft you will need to cut the hosel closer to the clubhead than you would for a normal hickory shafted club. This in turn means that the whipping will run closer to the top of the clubhead than a normal hickory shafted club.
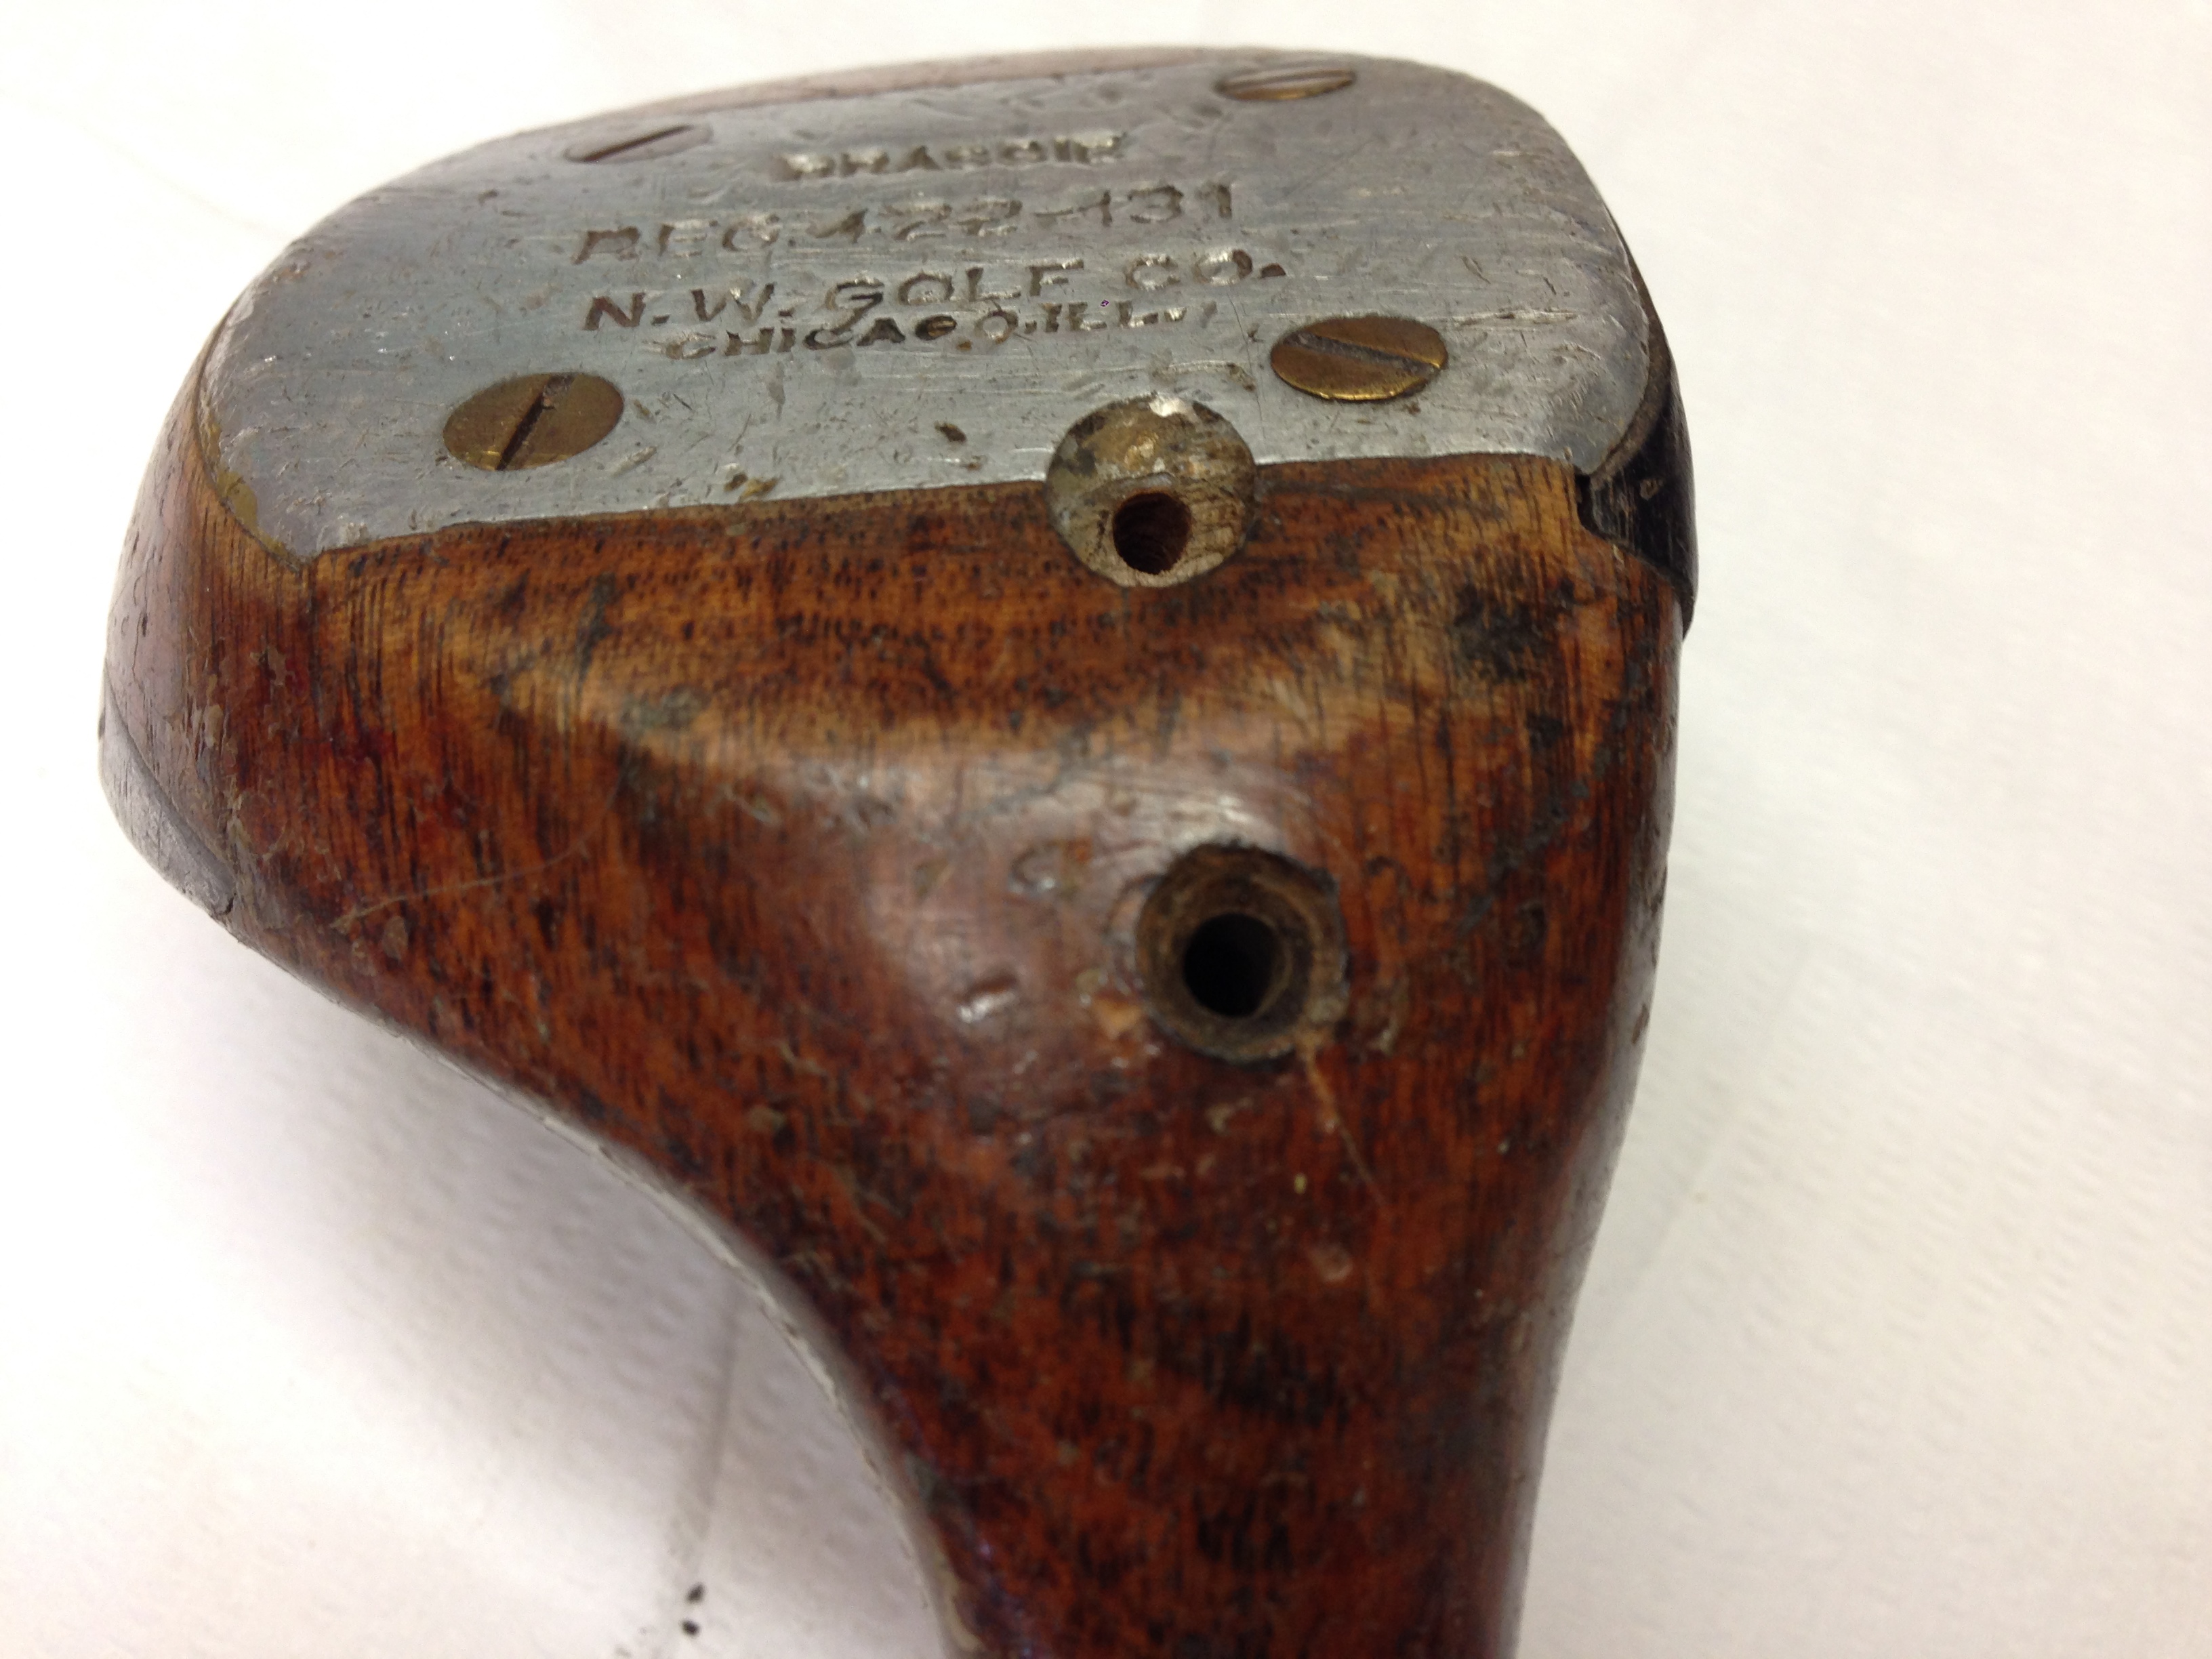
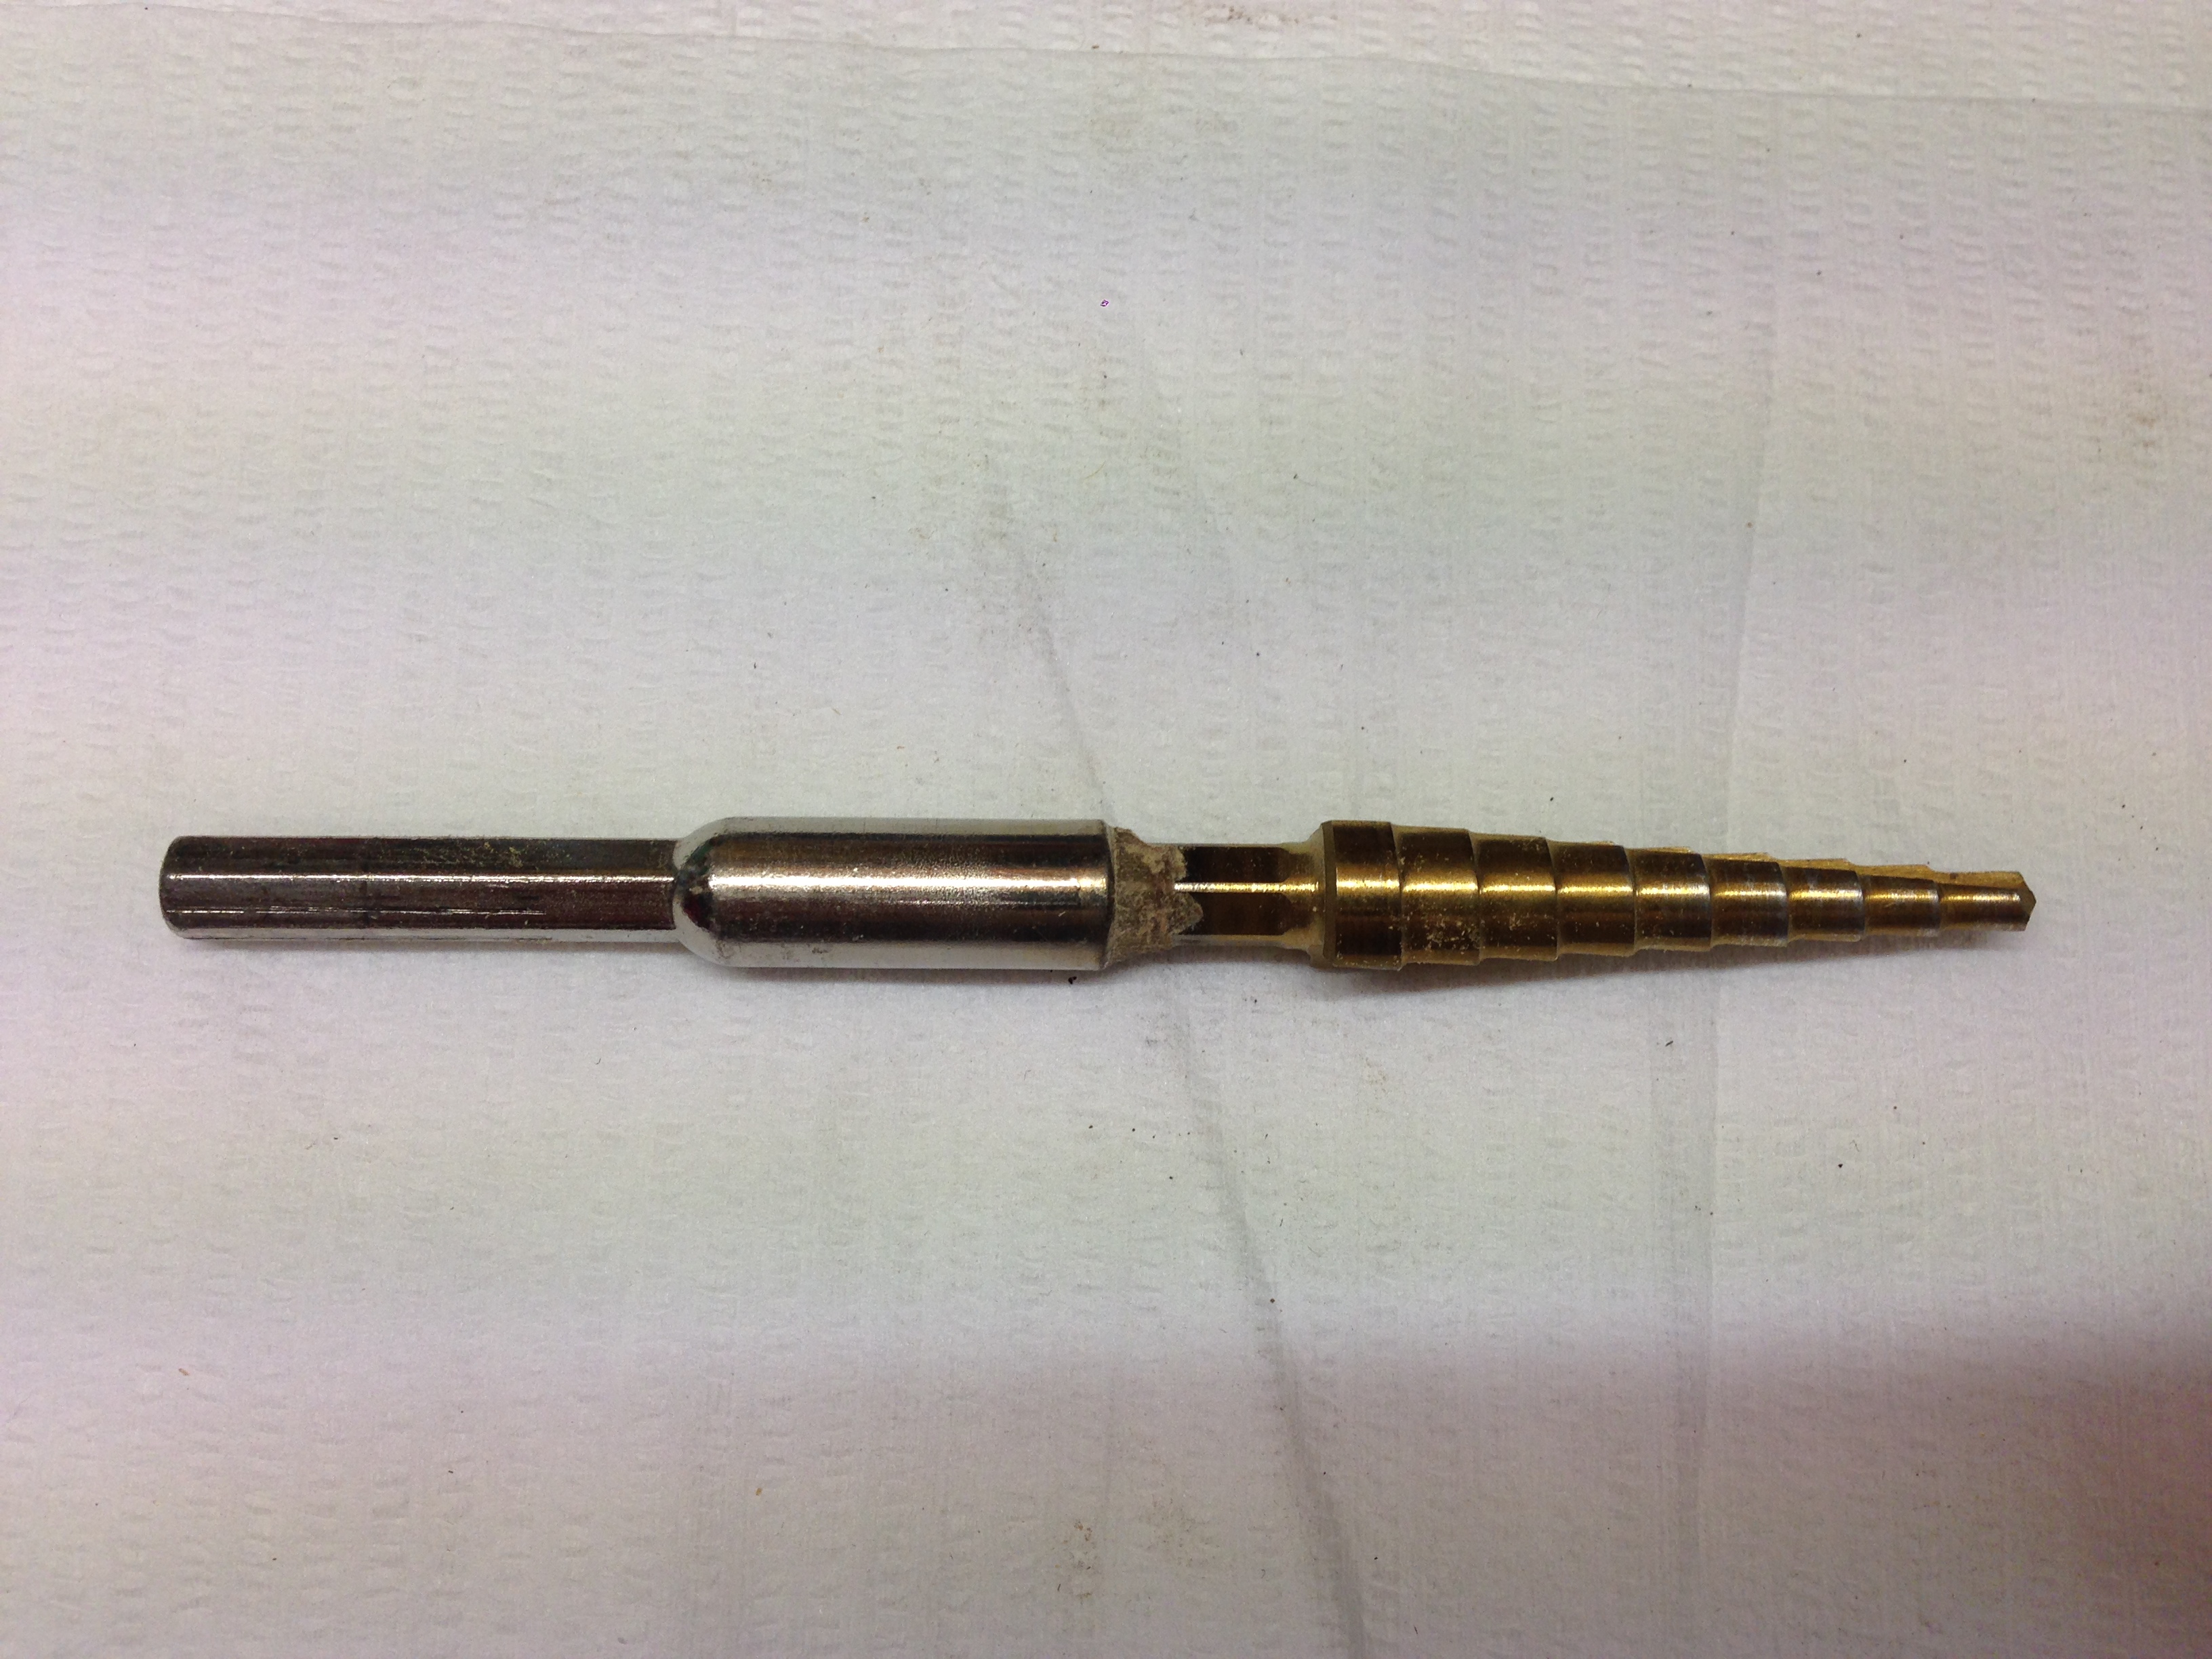
I bore out the hosel using a step-drill that steps from 4mm to 12mm in 9 graduations. I use the “CraftRight” brand from Bunnings which come in a set of 3. There are more expensive single bits that have 12 graduations but I find the Bunnings bits are fine. I have lengthened my bit by adding a hex bit from a socket set. This allows me to drill through the hosel with plenty of clearance. I drill the hosel by hand using a cordless drill with the clubhead secured in a vice. I generally drill through the base until the 4-6mm graduation appears, from my experience this gives a hole in the base of a similar size to what is normally seen in hickory clubs. With the hole from the steel shaft already running through to the base of the club it is just a matter of using this as a guide and slowly advancing the step bit. You may shave a bit off the base plate, depending where the steel shaft exited the base, but being aluminium or brass the step bit handles this easily and will leave a neat oval shape (see the Kro-Flite above).
Fitting the new hickory shaft is now simply a matter of carefully filing down the end of the shaft until it is a reasonably snug fit into the new bored-out hosel. I have a selection of files and rasps that I use for this. Once I’m happy with the fit I set it in place with “Ultra Clear” Araldite (you can use whatever glue you prefer). The important thing at this point is to ensure the grain of the shaft runs perpendicular to the face of the club. I mark the grain on the butt end of all my shafts so that aligning the shaft is no problem.
Now that the shaft is set into place all that remains is the finishing of the club. To ensure a seamless transition where the hosel and shaft meet I use epoxy putty carefully sanded back. It is a time consuming process but if done well the taper from clubhead to shaft is as indistinguishable as it is in all hickory shafted woods. The nice thing about epoxy putty is that it will take stain so you can colour it to match the club head or shaft if you desire.

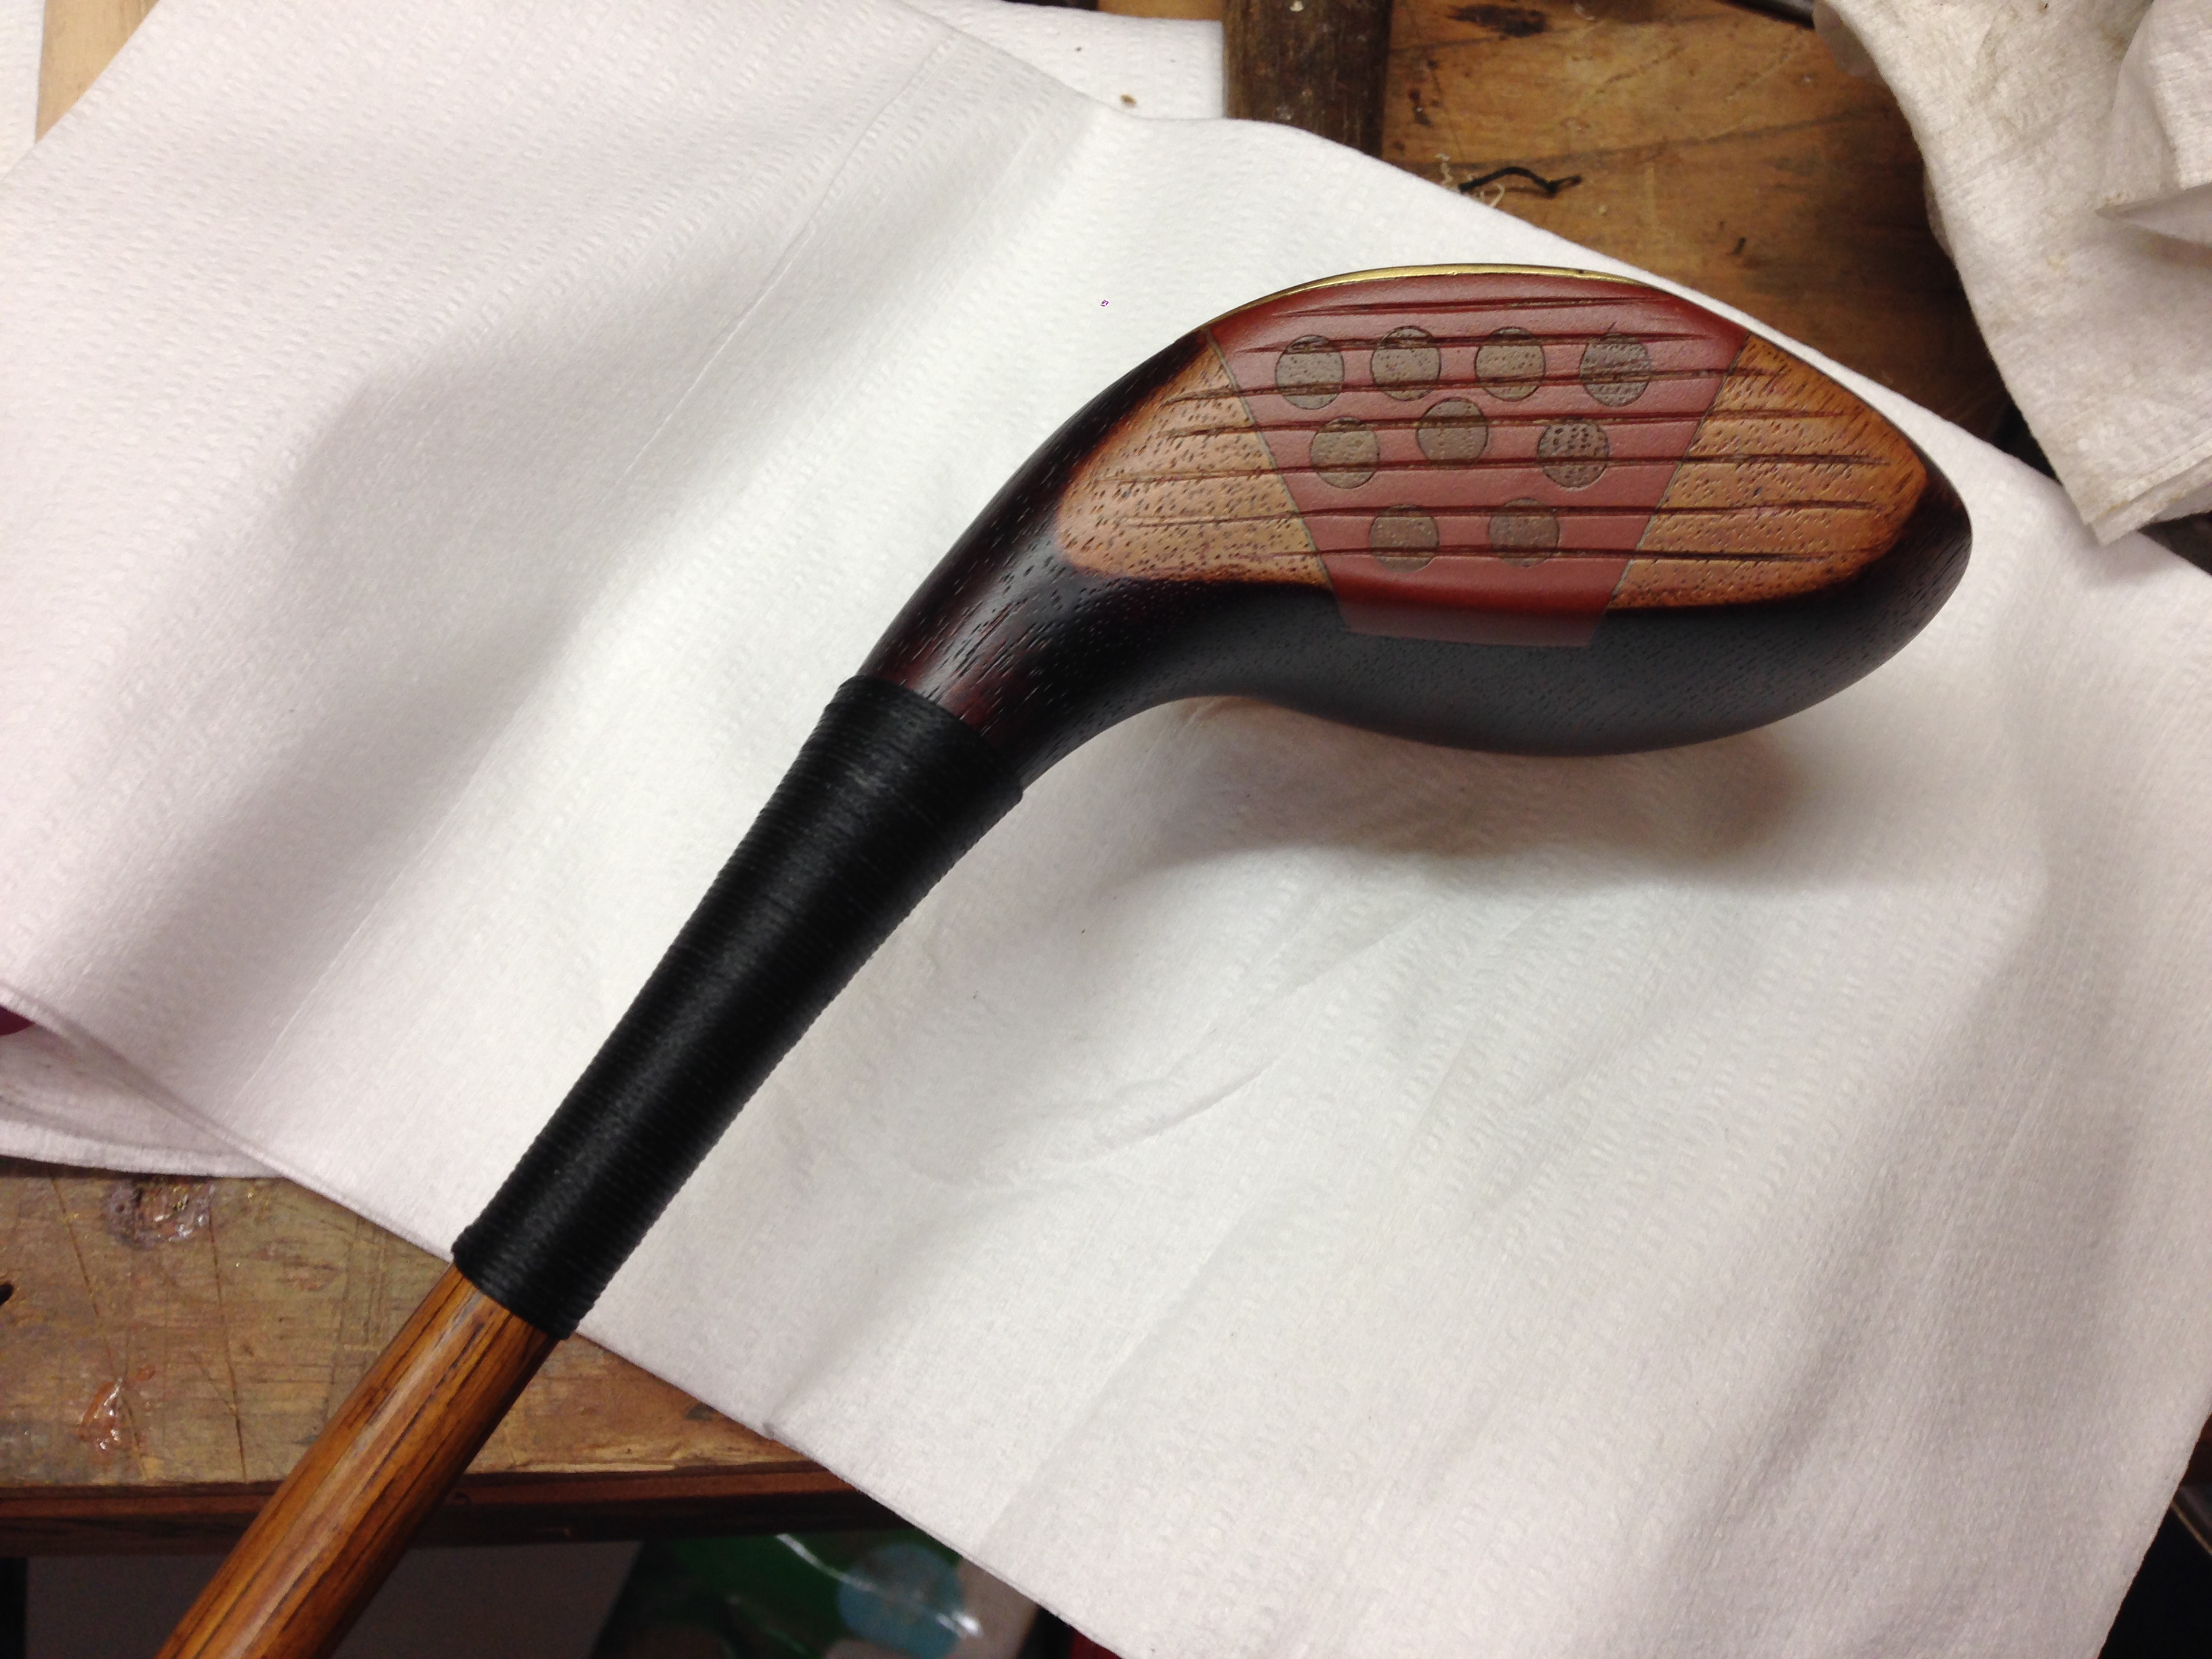

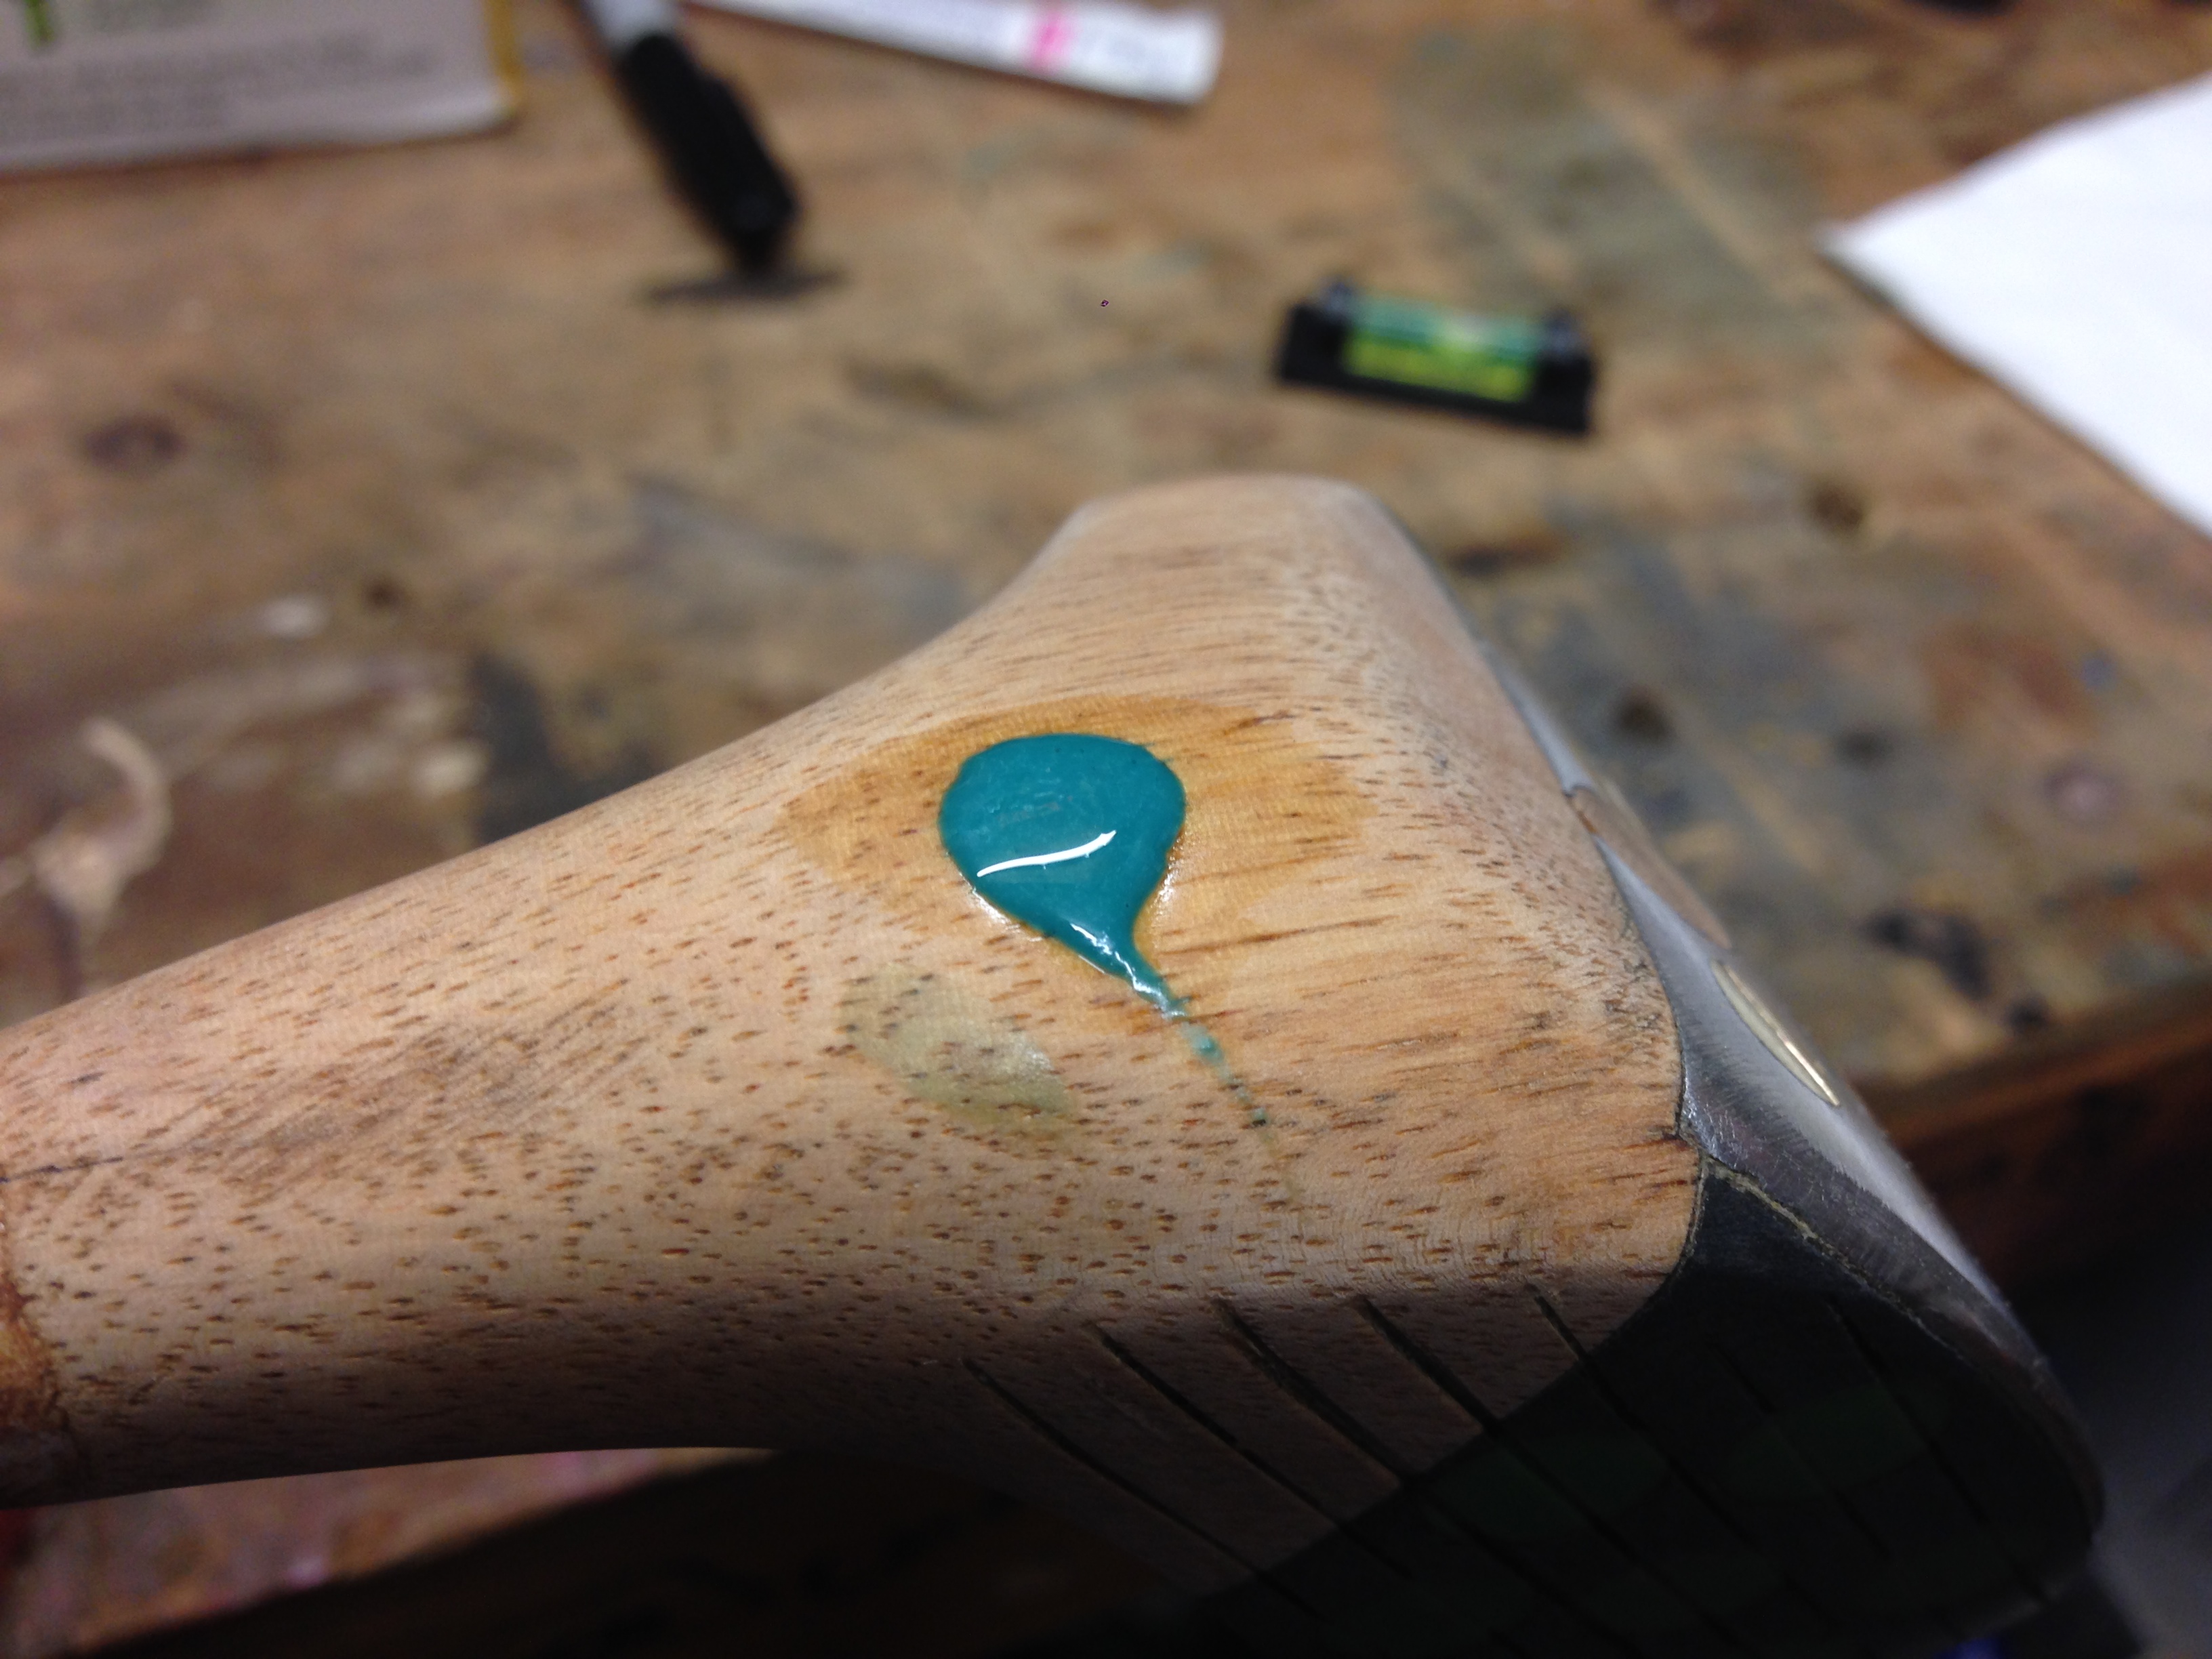
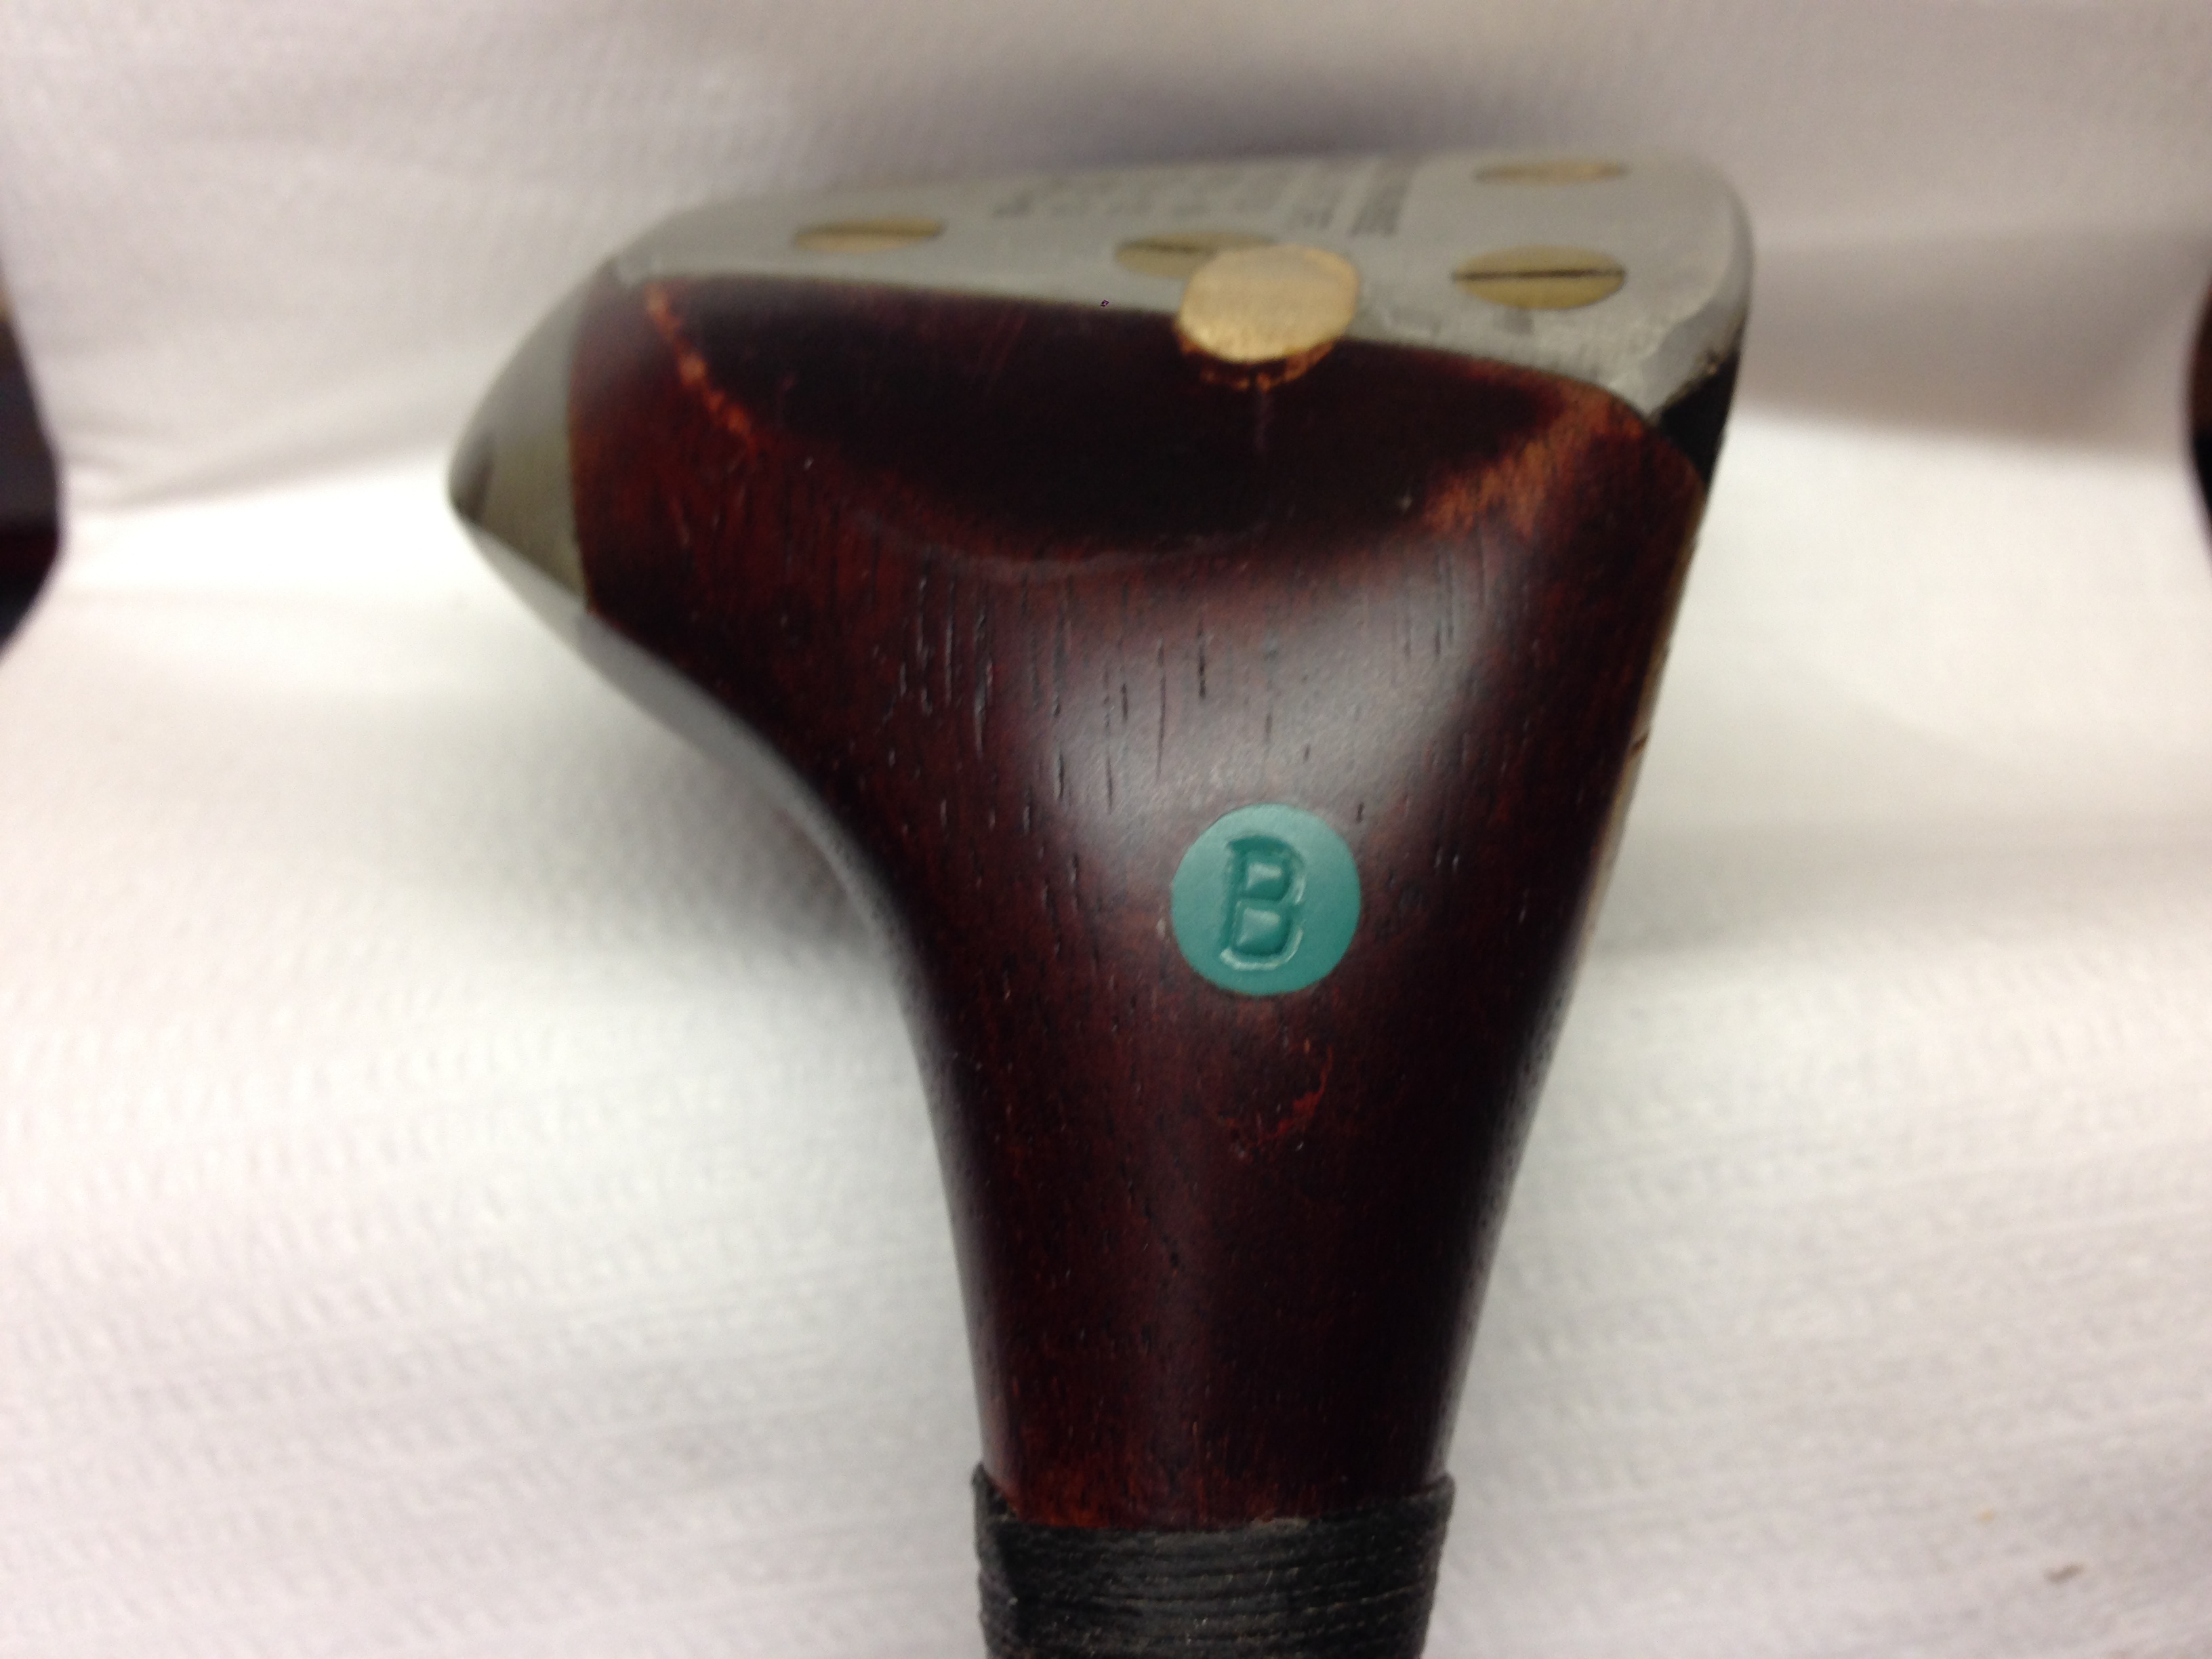
The screw hole at the back of the hosel can sometimes be the only giveaway that a once steel shafted wood has been re-shafted with a hickory shaft. After experimenting with casting resin to repair a damaged face insert I decided that resin would be the ideal material to fill the hole left by the hosel screw. I place the club in the vice making sure the hosel area is level. The casting resin I use takes 5-10 mins to set so when ready I line the hole with 5 min araldite and then carefully syringe in the resin to just overfill the hole. When set it can be filed or sanded down to the desired finish. I have begun stamping my resin plugs with the letter that represents the wood, so “B” for Brassie and so on. If the club has an insert face I try to match the plug colour to the colour of the insert.
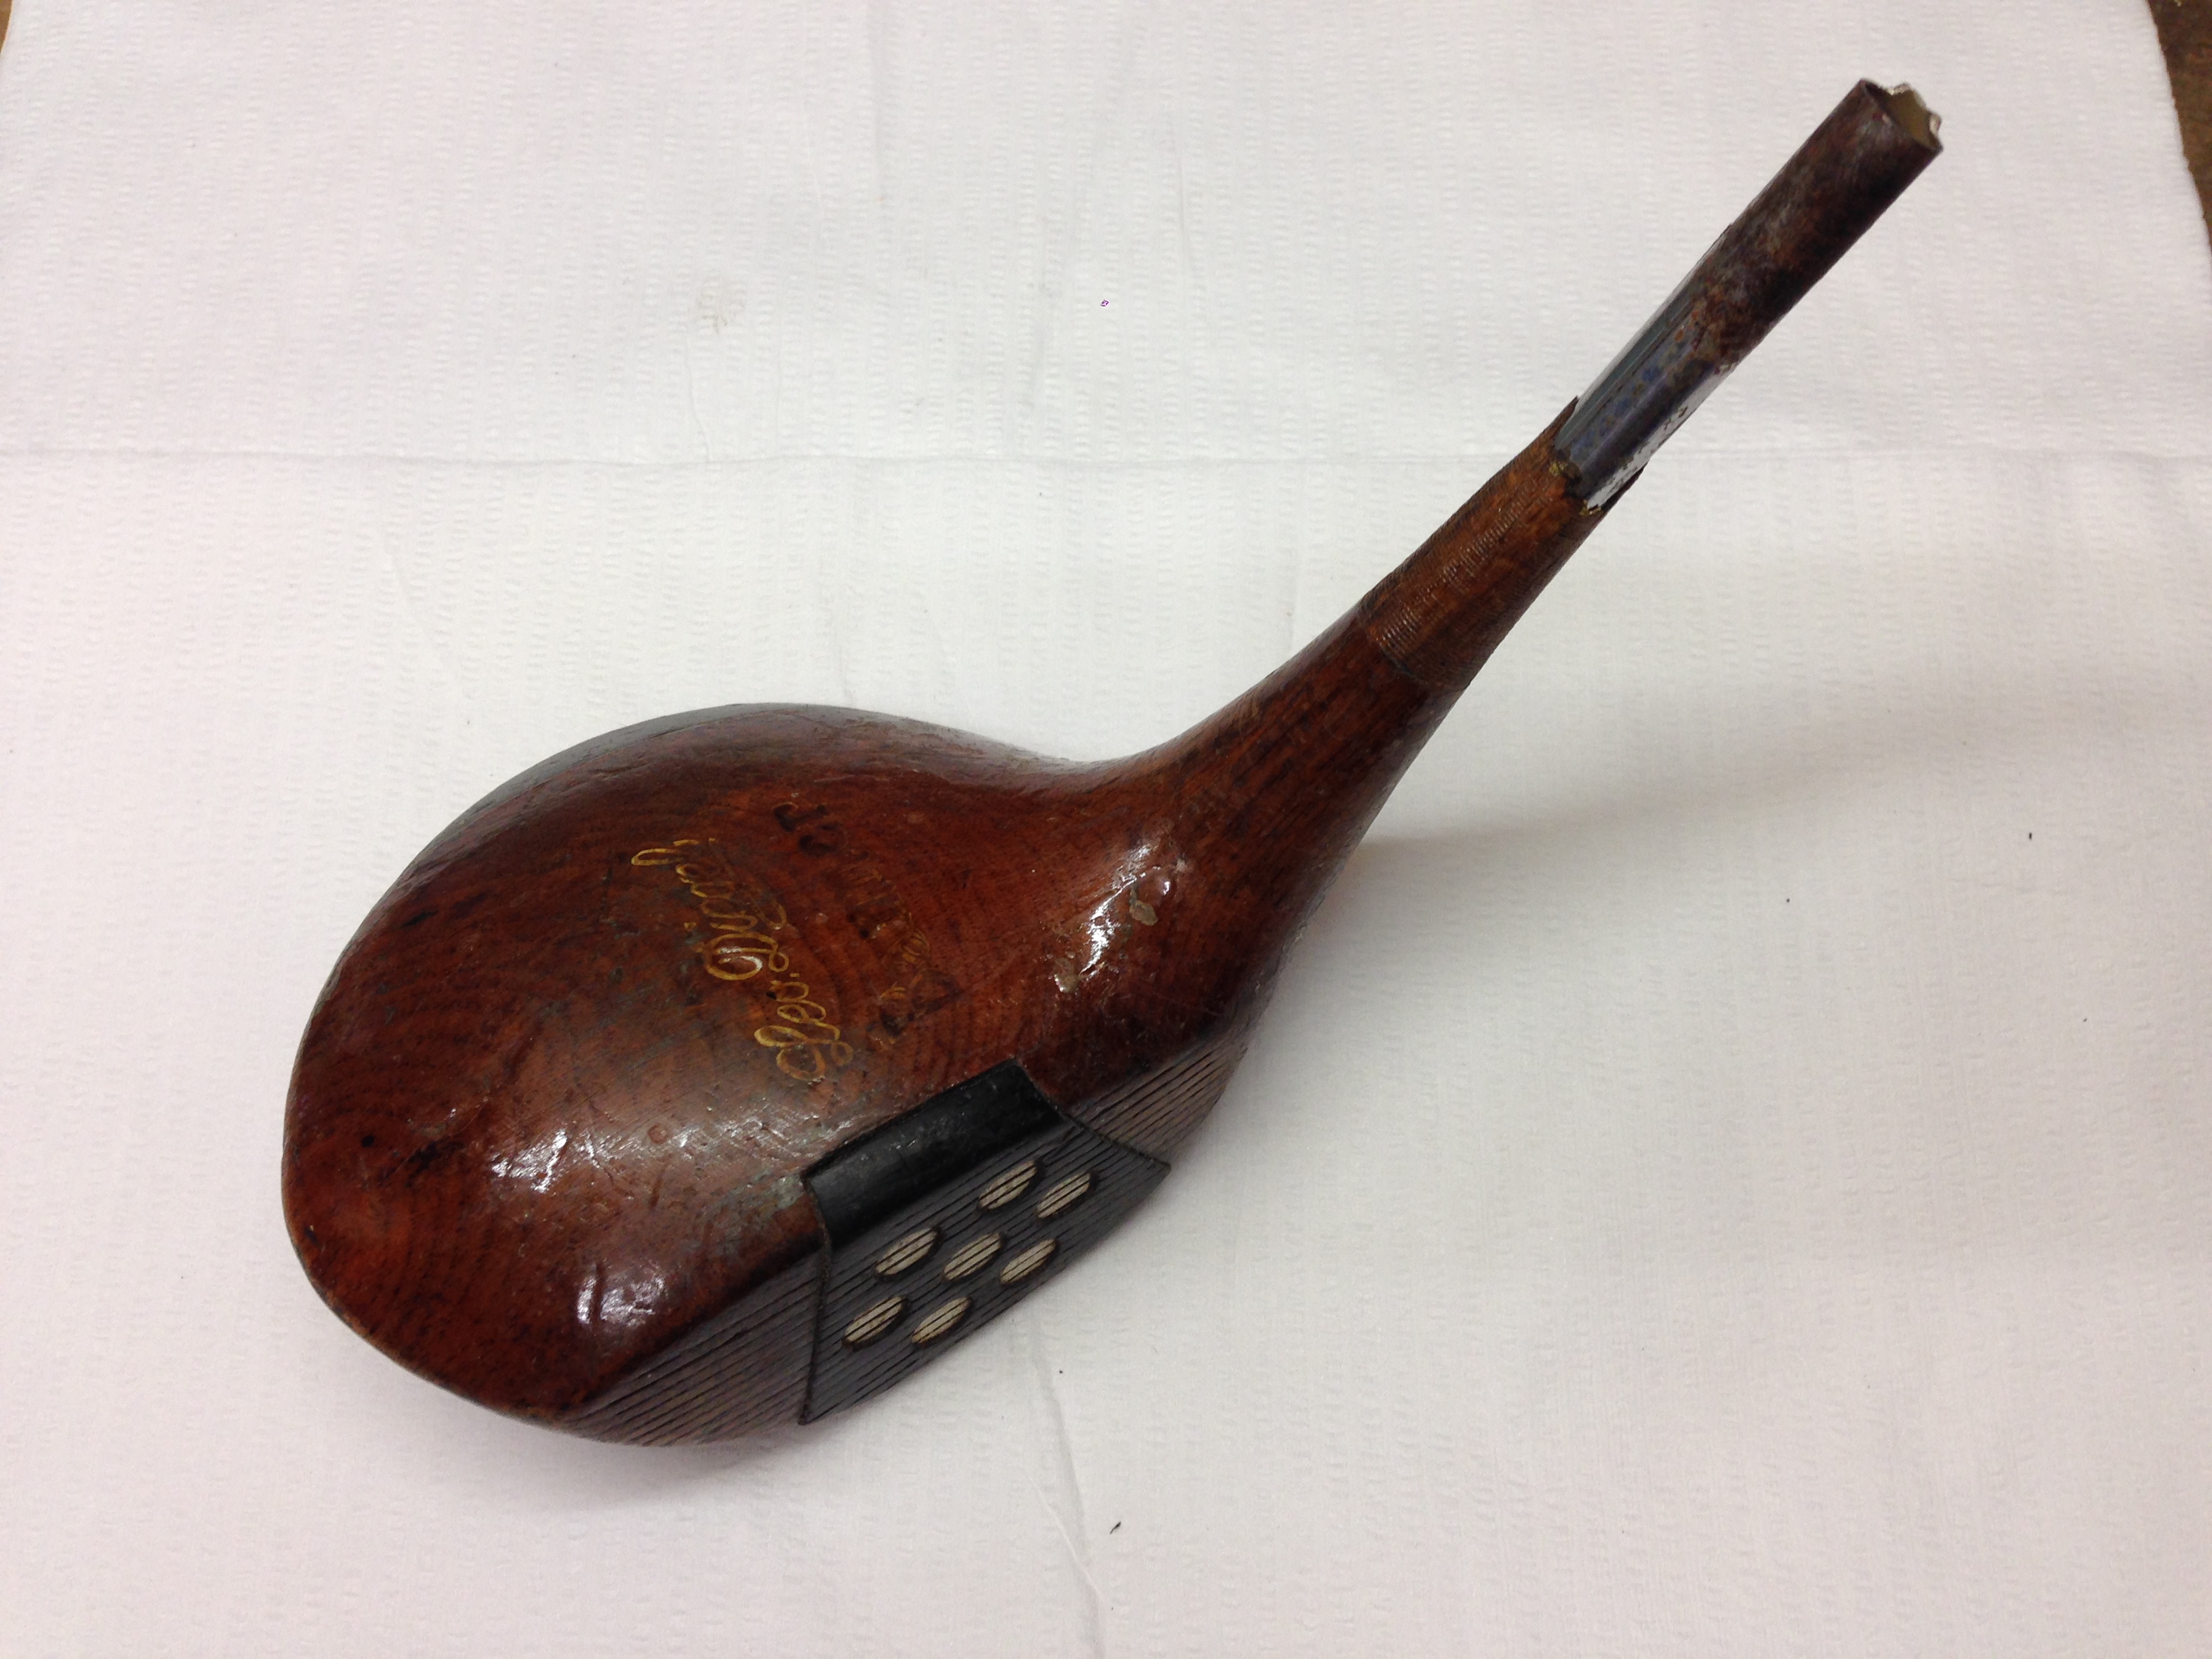
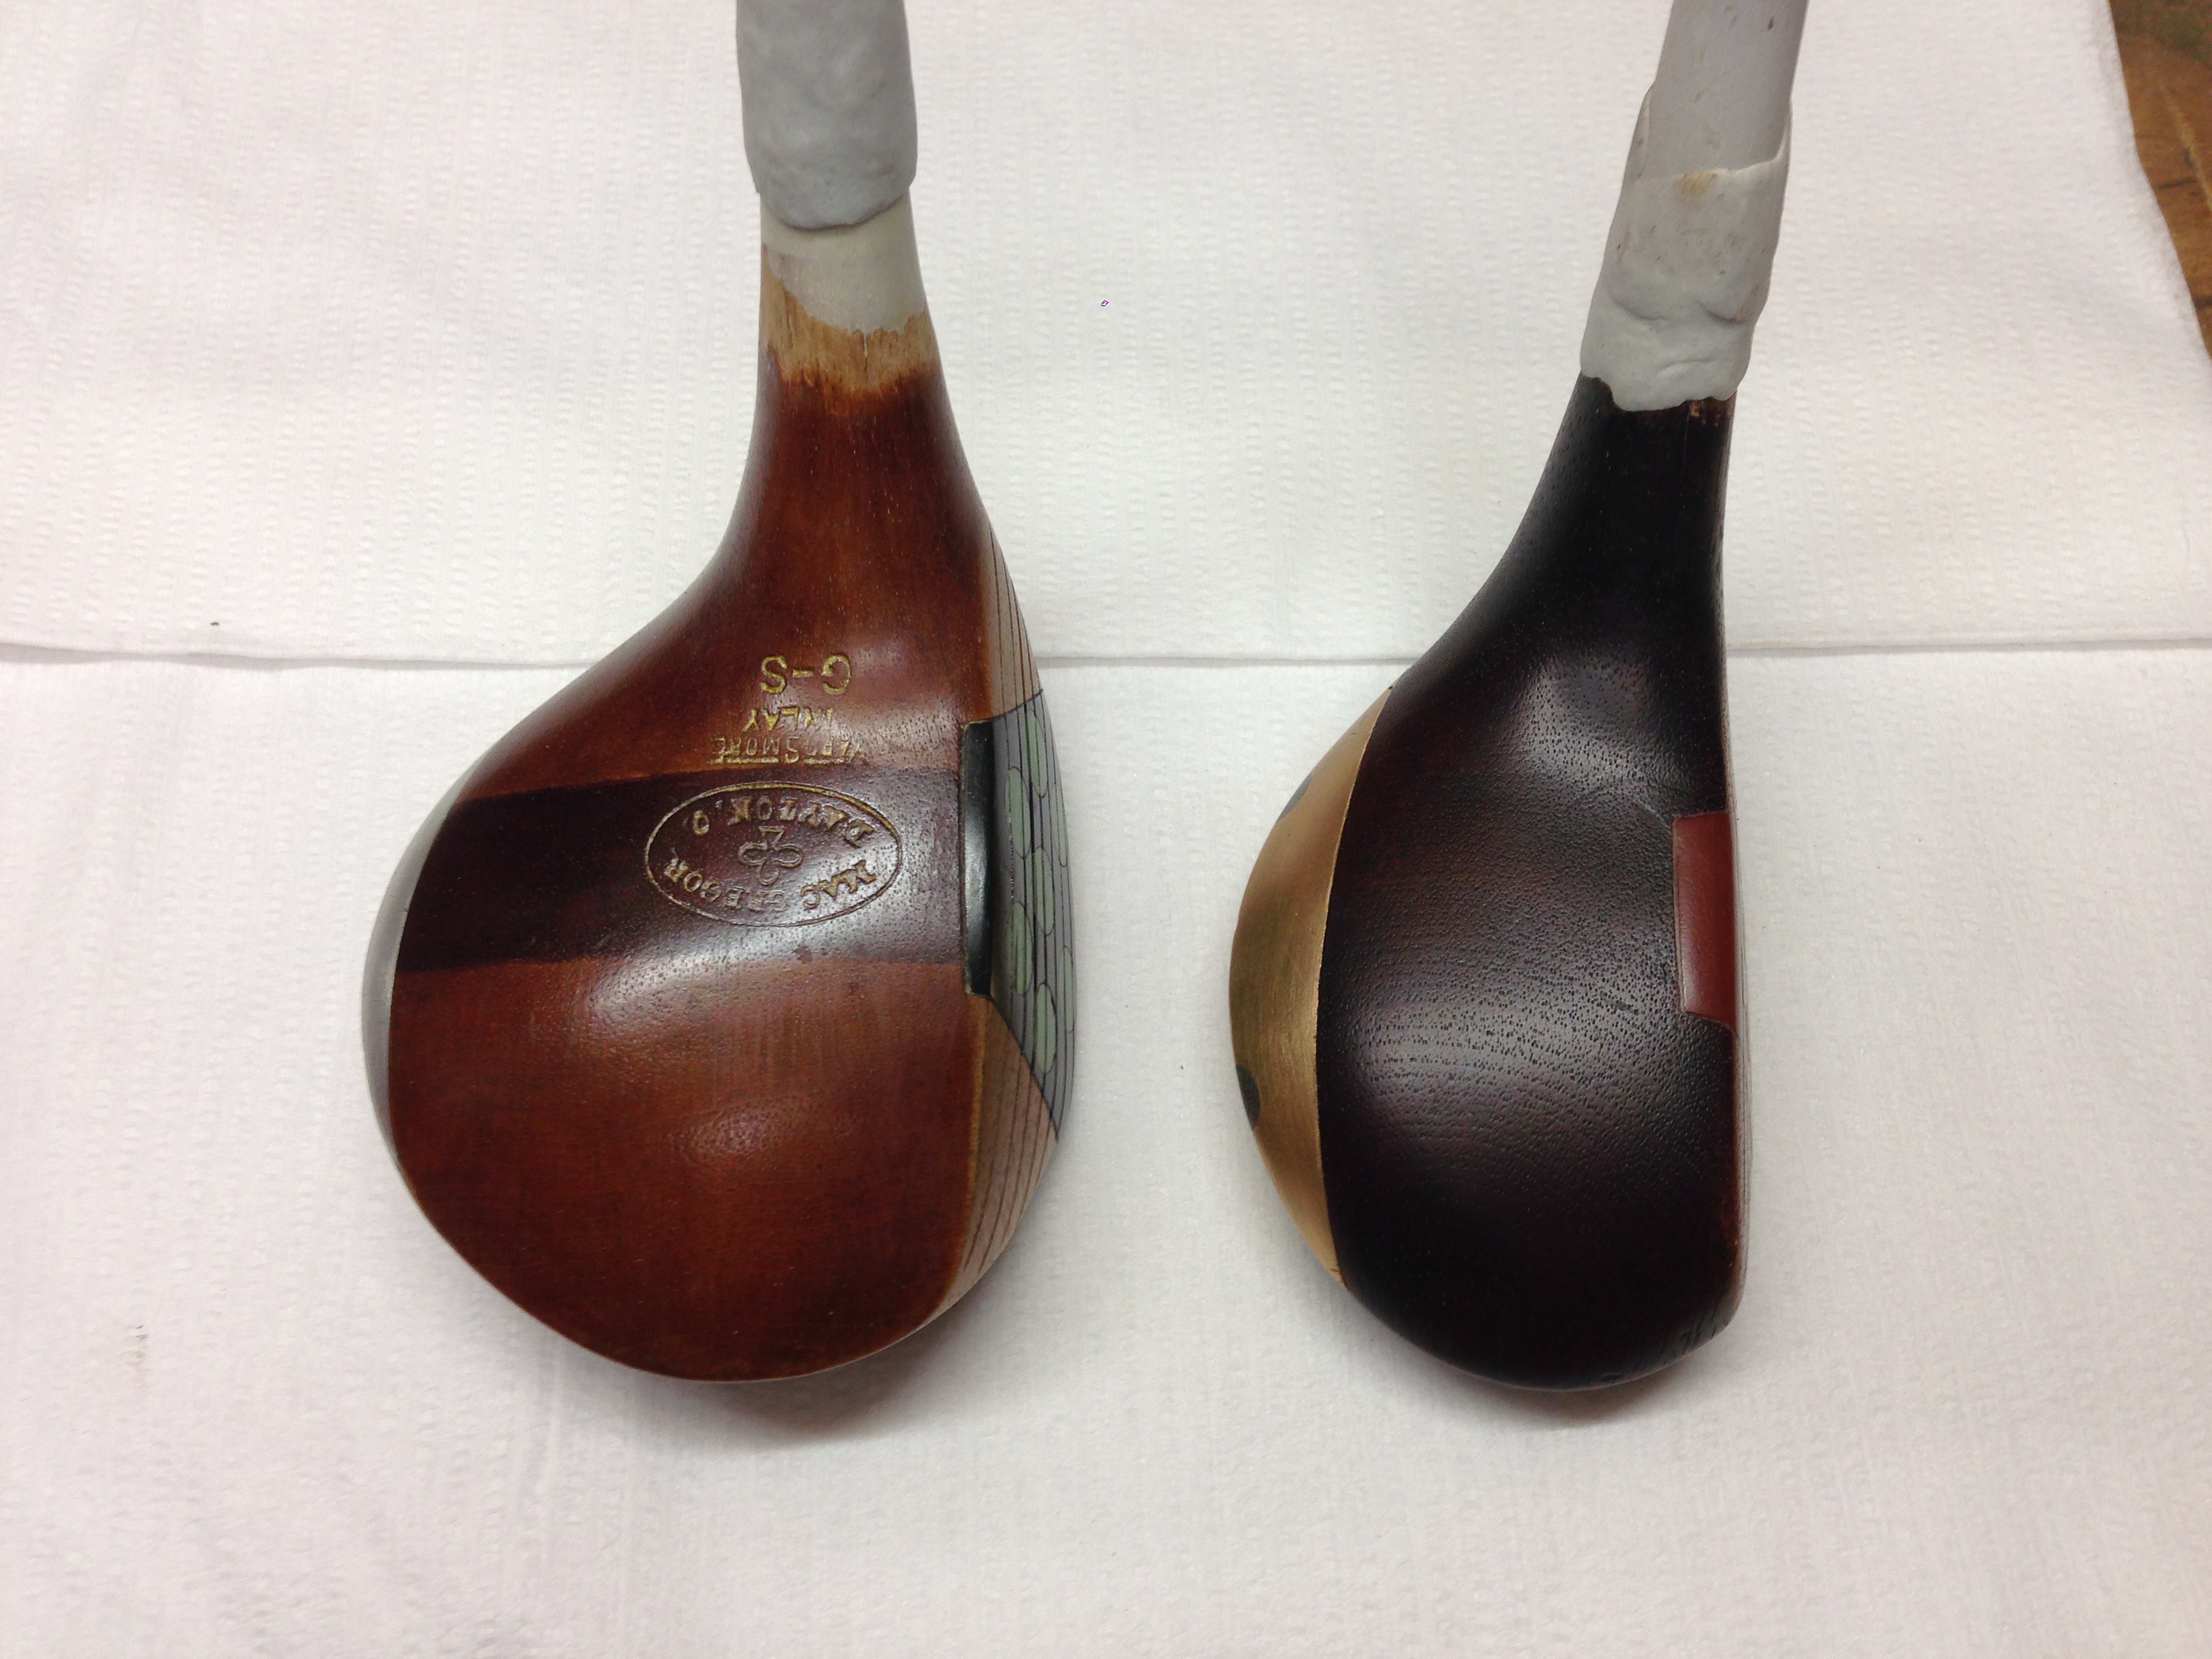
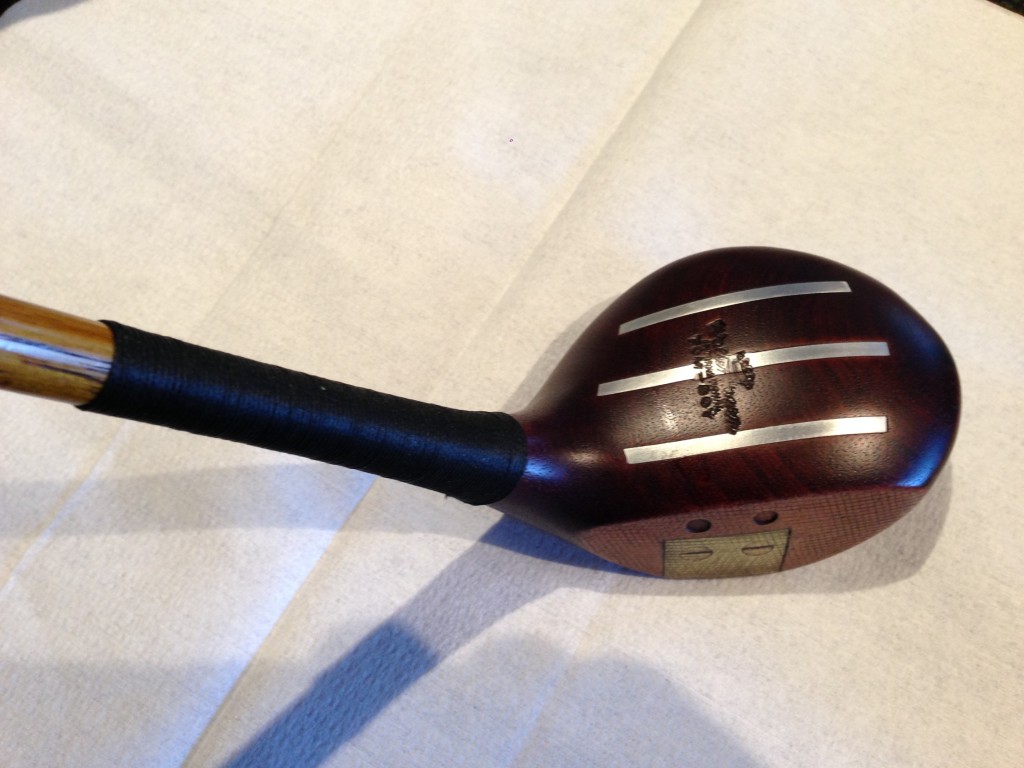 My 1935 Wilson "Walter Hagen Tom-Boy" re-shafted spoon
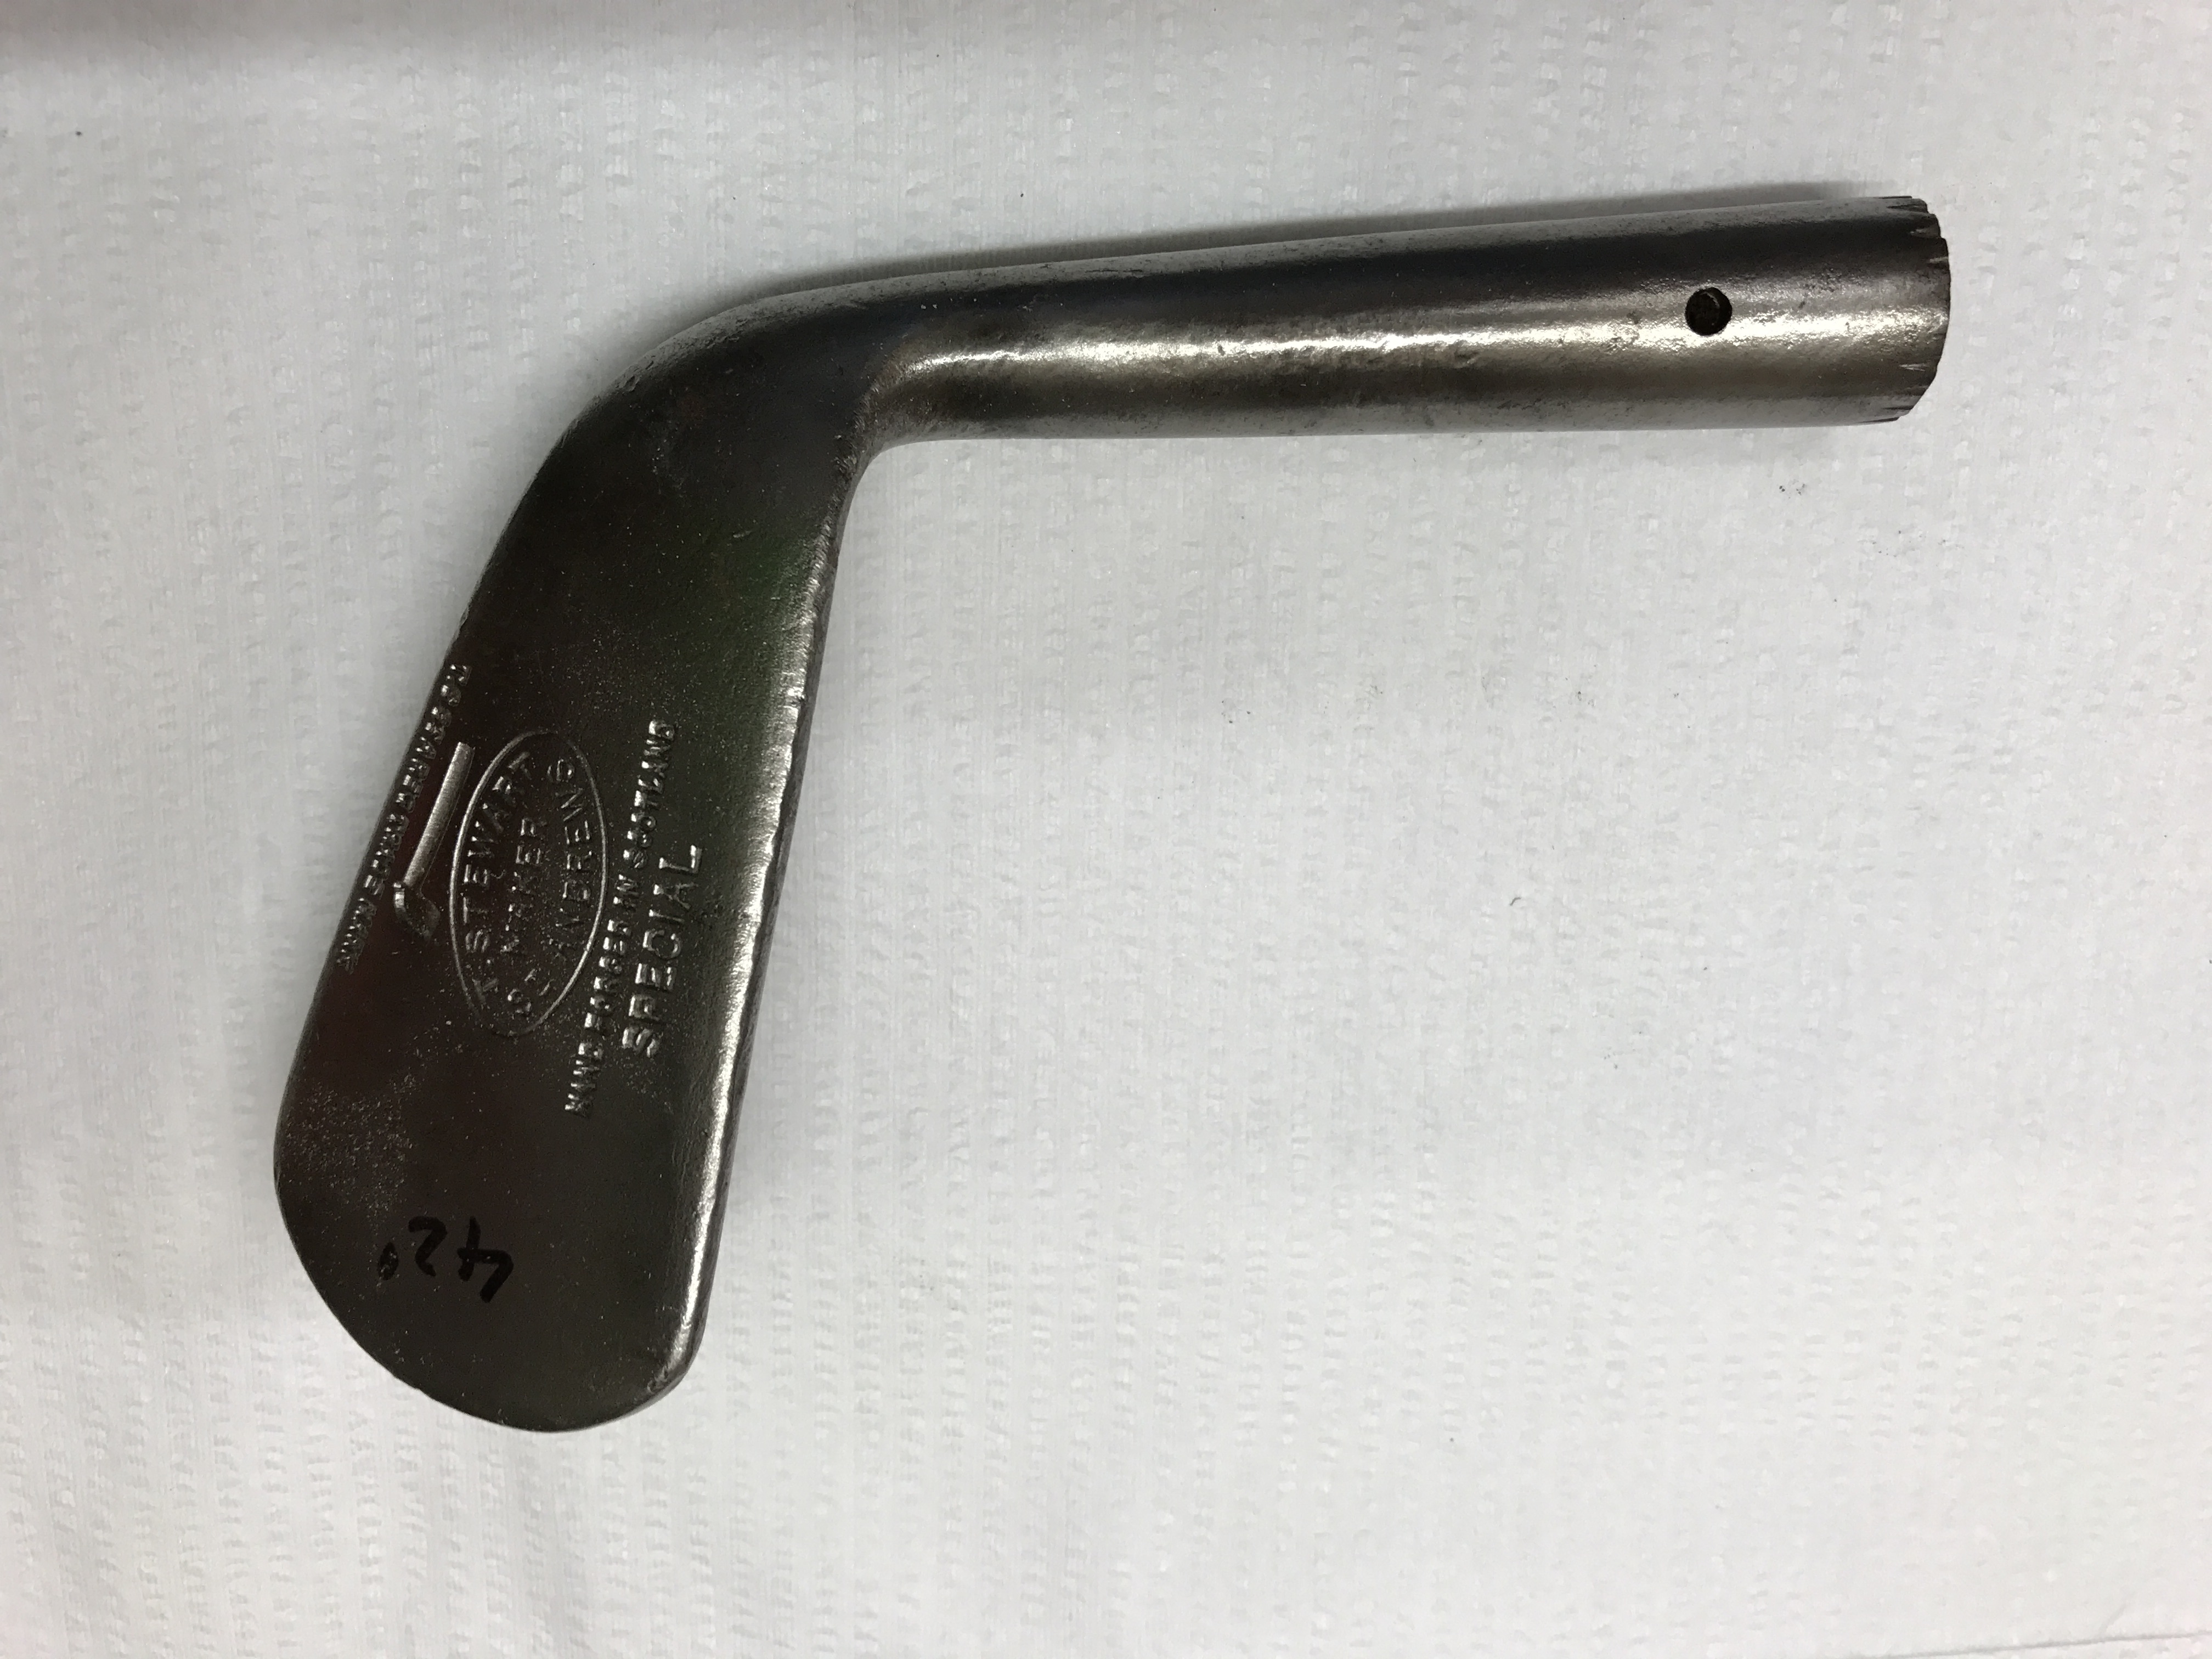
2. How to re-pin an Iron
I usually re-pin all of the clubs I am going to use for play. An original club that may seem tight in the hosel at first may loosen up after a few hits and will then spend the rest of the round in the bag unusable. It's a simple procedure that ensures your club is ready for play.
The first step is usually removing the pin from a loose iron. At times they can be extremely difficult to find but rest assured there is one there somewhere, the epoxies that we rely on in modern club fitting were not available during the hickory era. If the hosel is rusted over I clean them up with a bit of sandpaper, this often reveals the location of the pin. A pair of loupes or a magnifying glass are handy to have around. You're looking for a small circle (approx 3mm in diameter) that will be 15-25mm from the end of the hosel. The pin position should be perpendicular to the blade so that when the blade is laying flat on the bench the pin is facing skywards. If both the blade and estimated pin position are both in the same plane then chances are you haven't found the pin. Once you have found it mark it with a permanent marker and check and re-check that you are happy with its location.
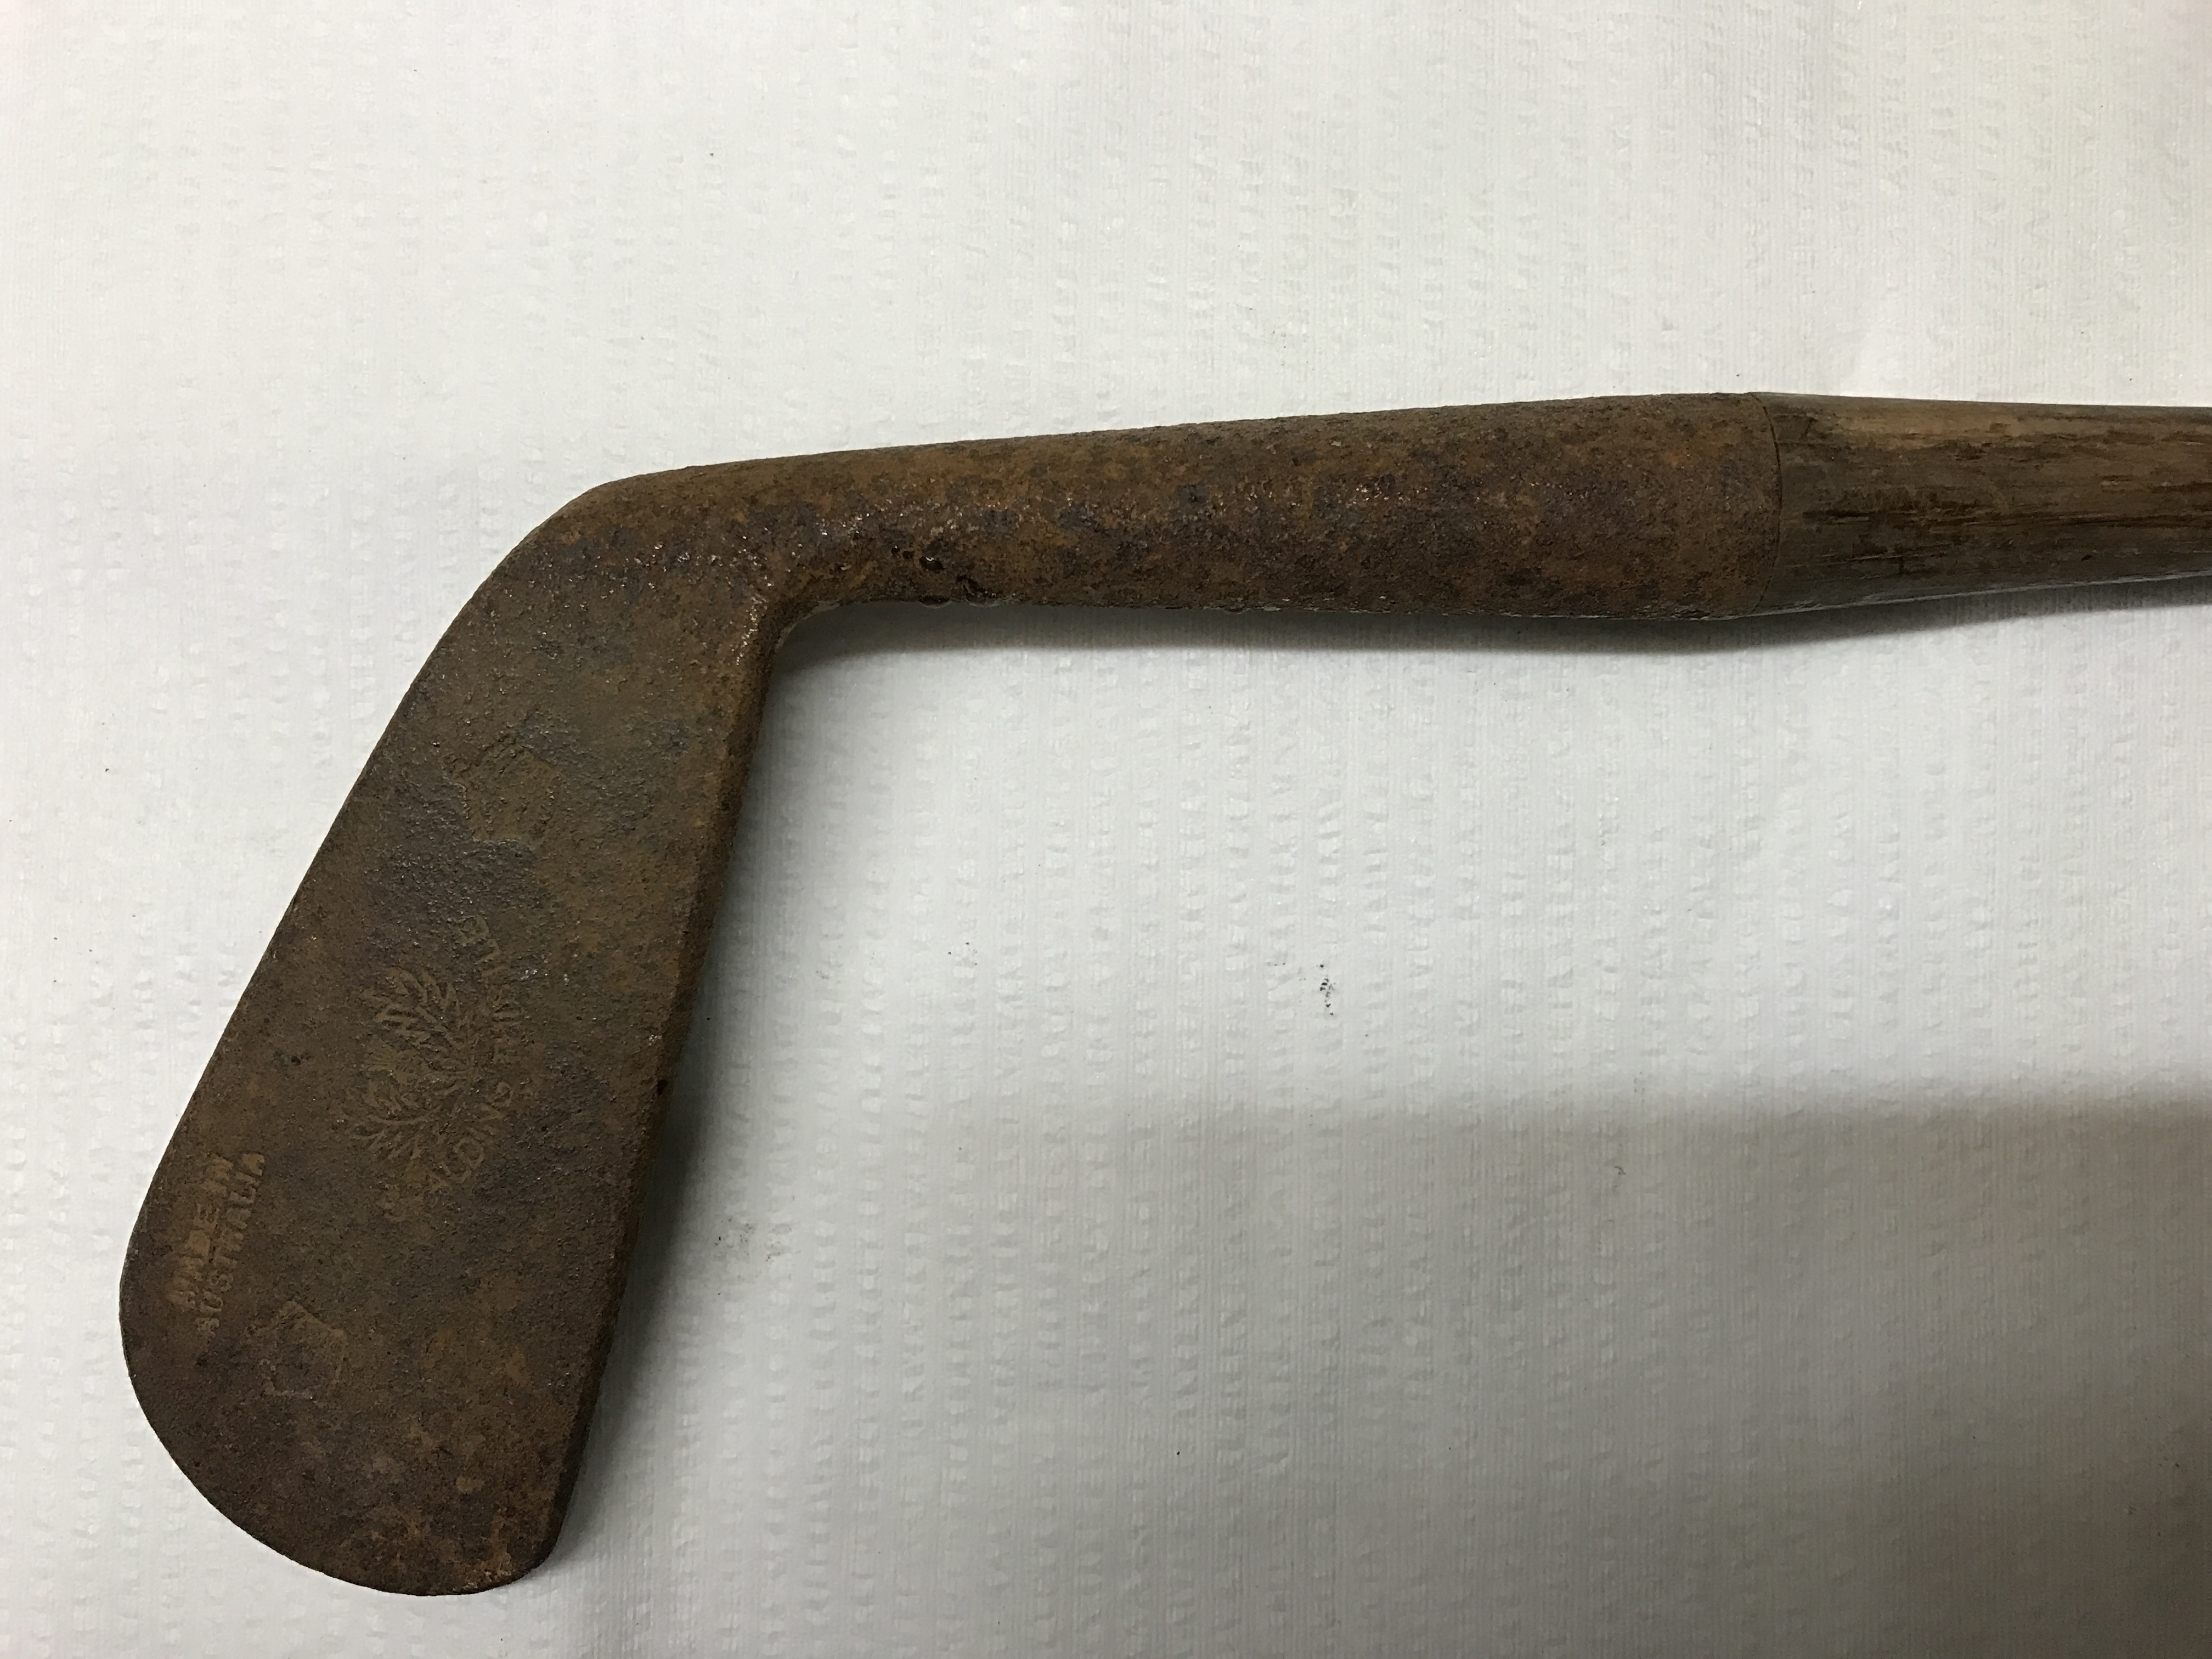
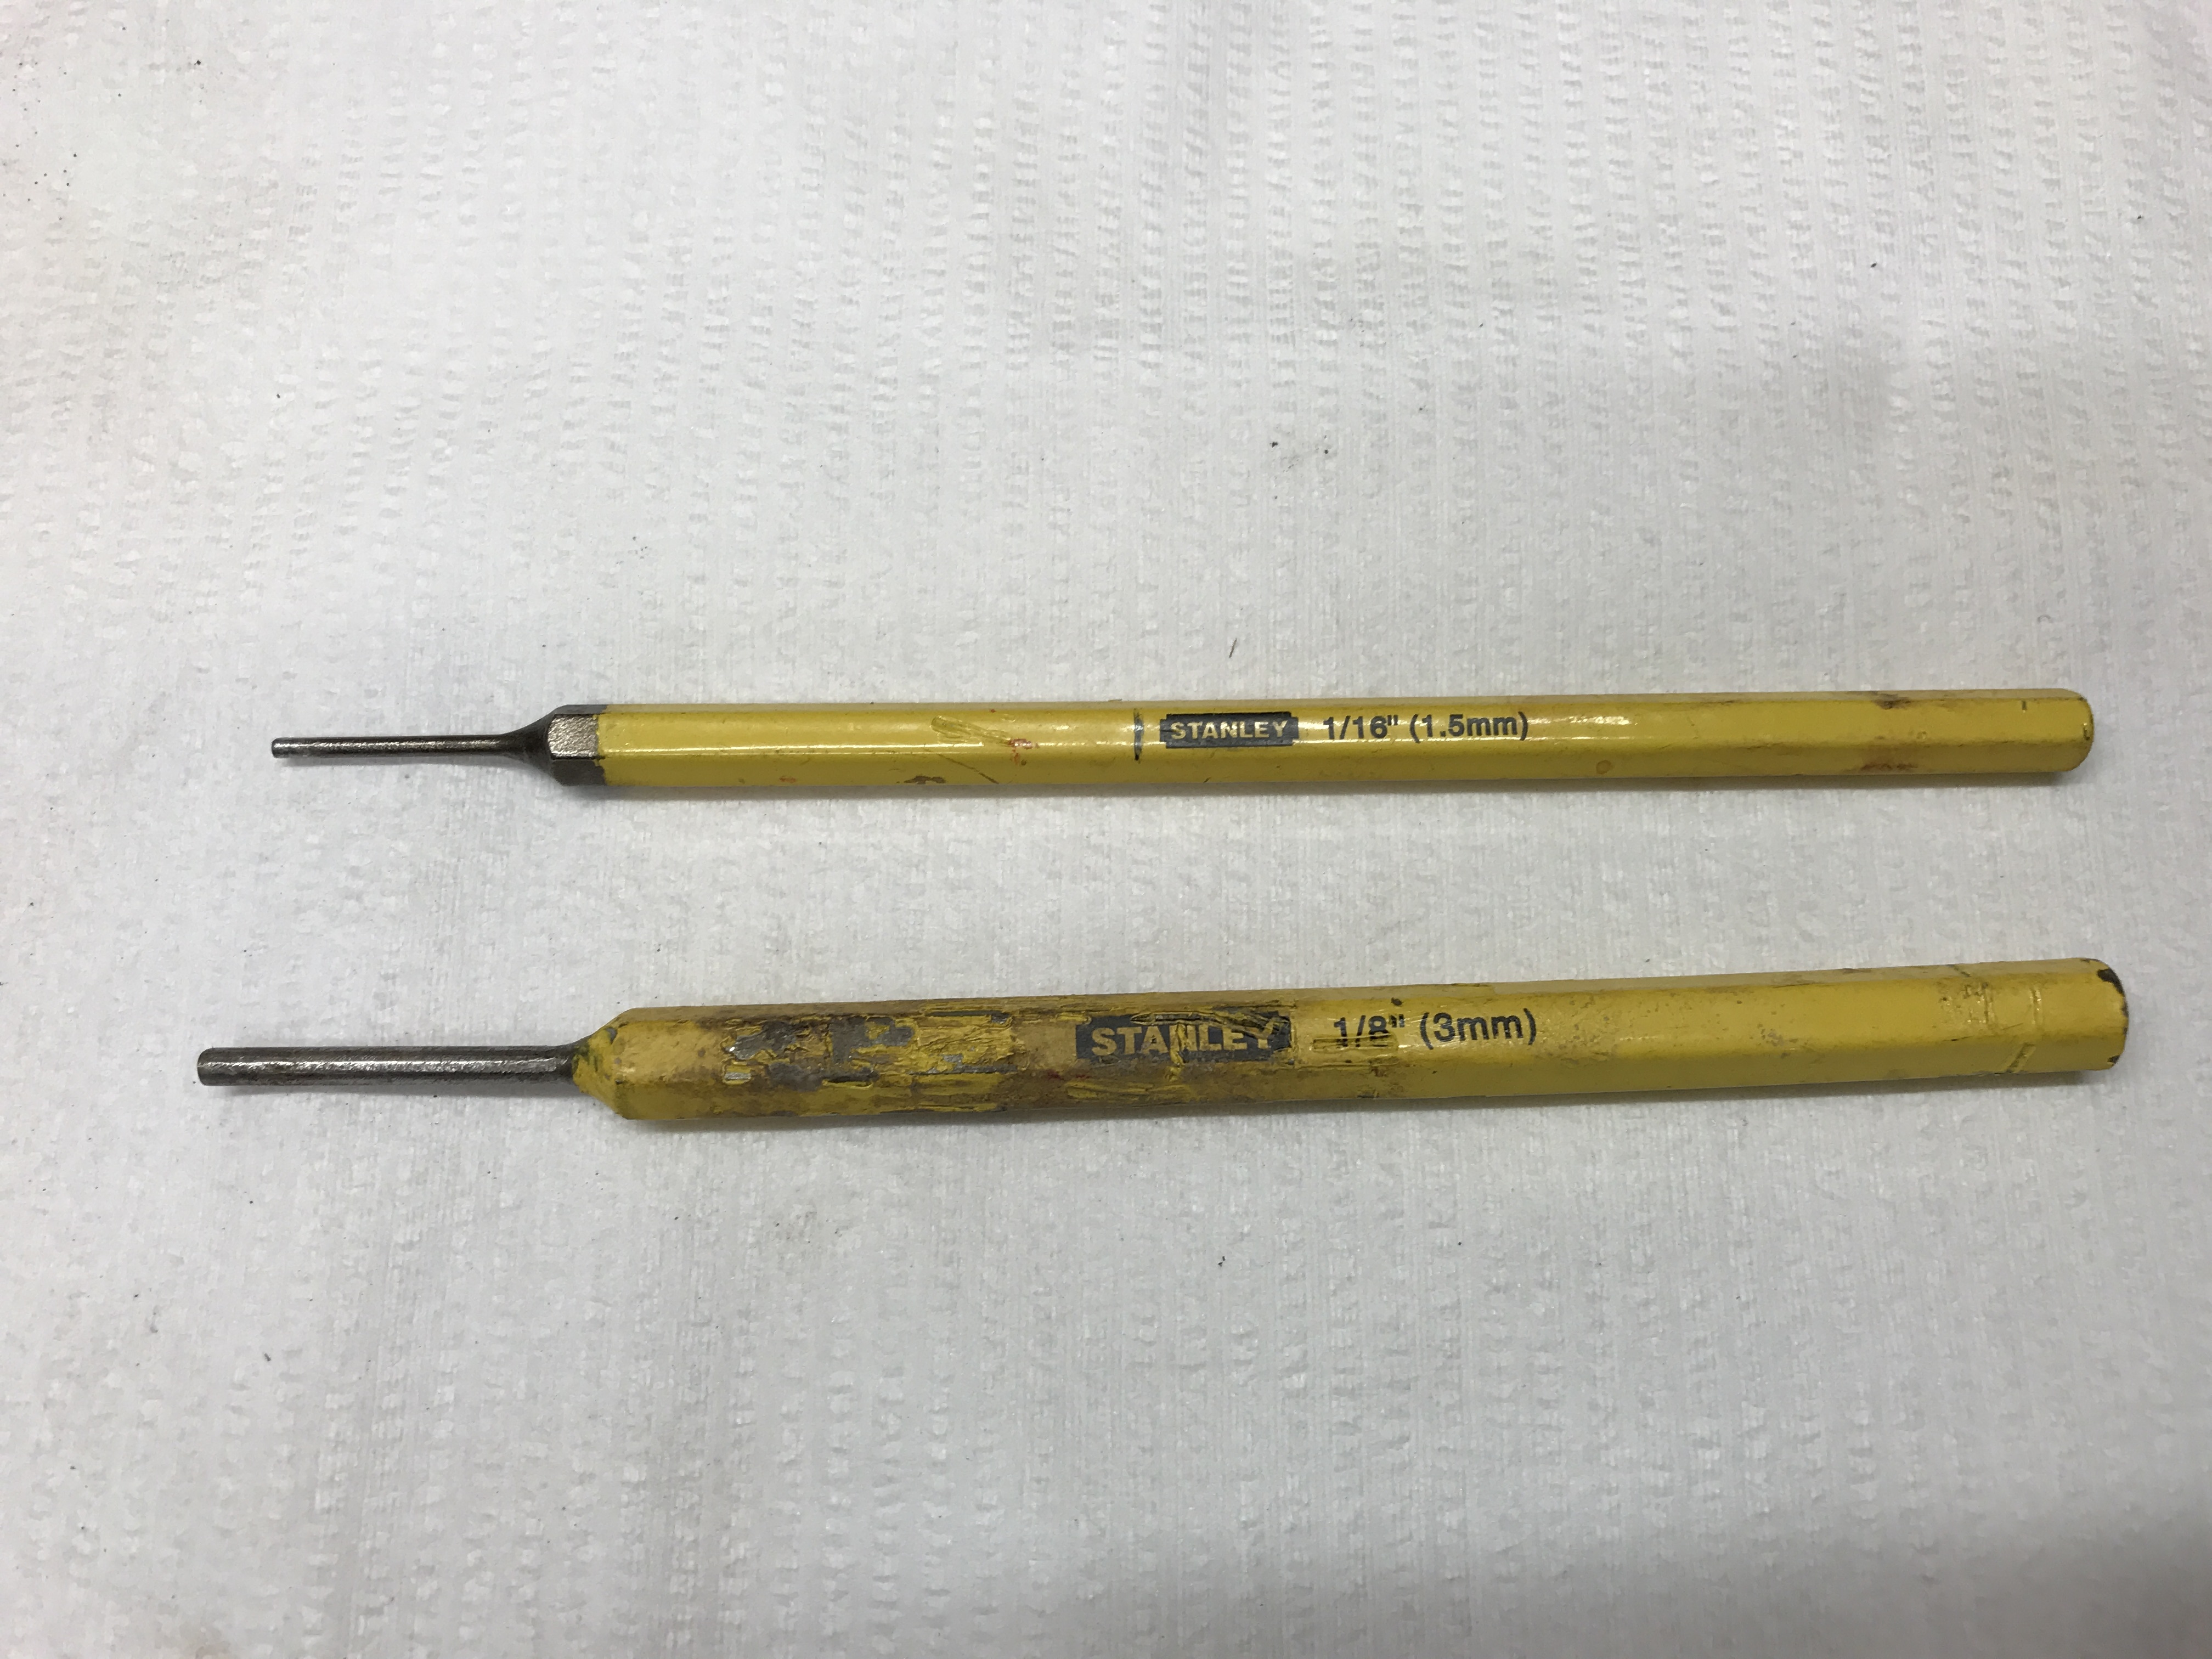
If you are mistaken don't panic, you won't be the first or last person to mistakenly punch a nice circular dent in the hosel of a club, sometimes the pin positions are so well hidden that you will have to hit and hope. The good news is that the impact of the punch will often reveal the true location of the pin. Clamp the club so that the hosel, and not the shaft, will take the force of the blow from the hammer when you're punching the pin out. I use a 3mm and 1.5mm punch to remove the pin. I start with the 3mm punch. If the pin is tight and doesn't come out easily I finish punching with the smaller 1.5mm punch so that I don't risk damaging the hosel on the far side.
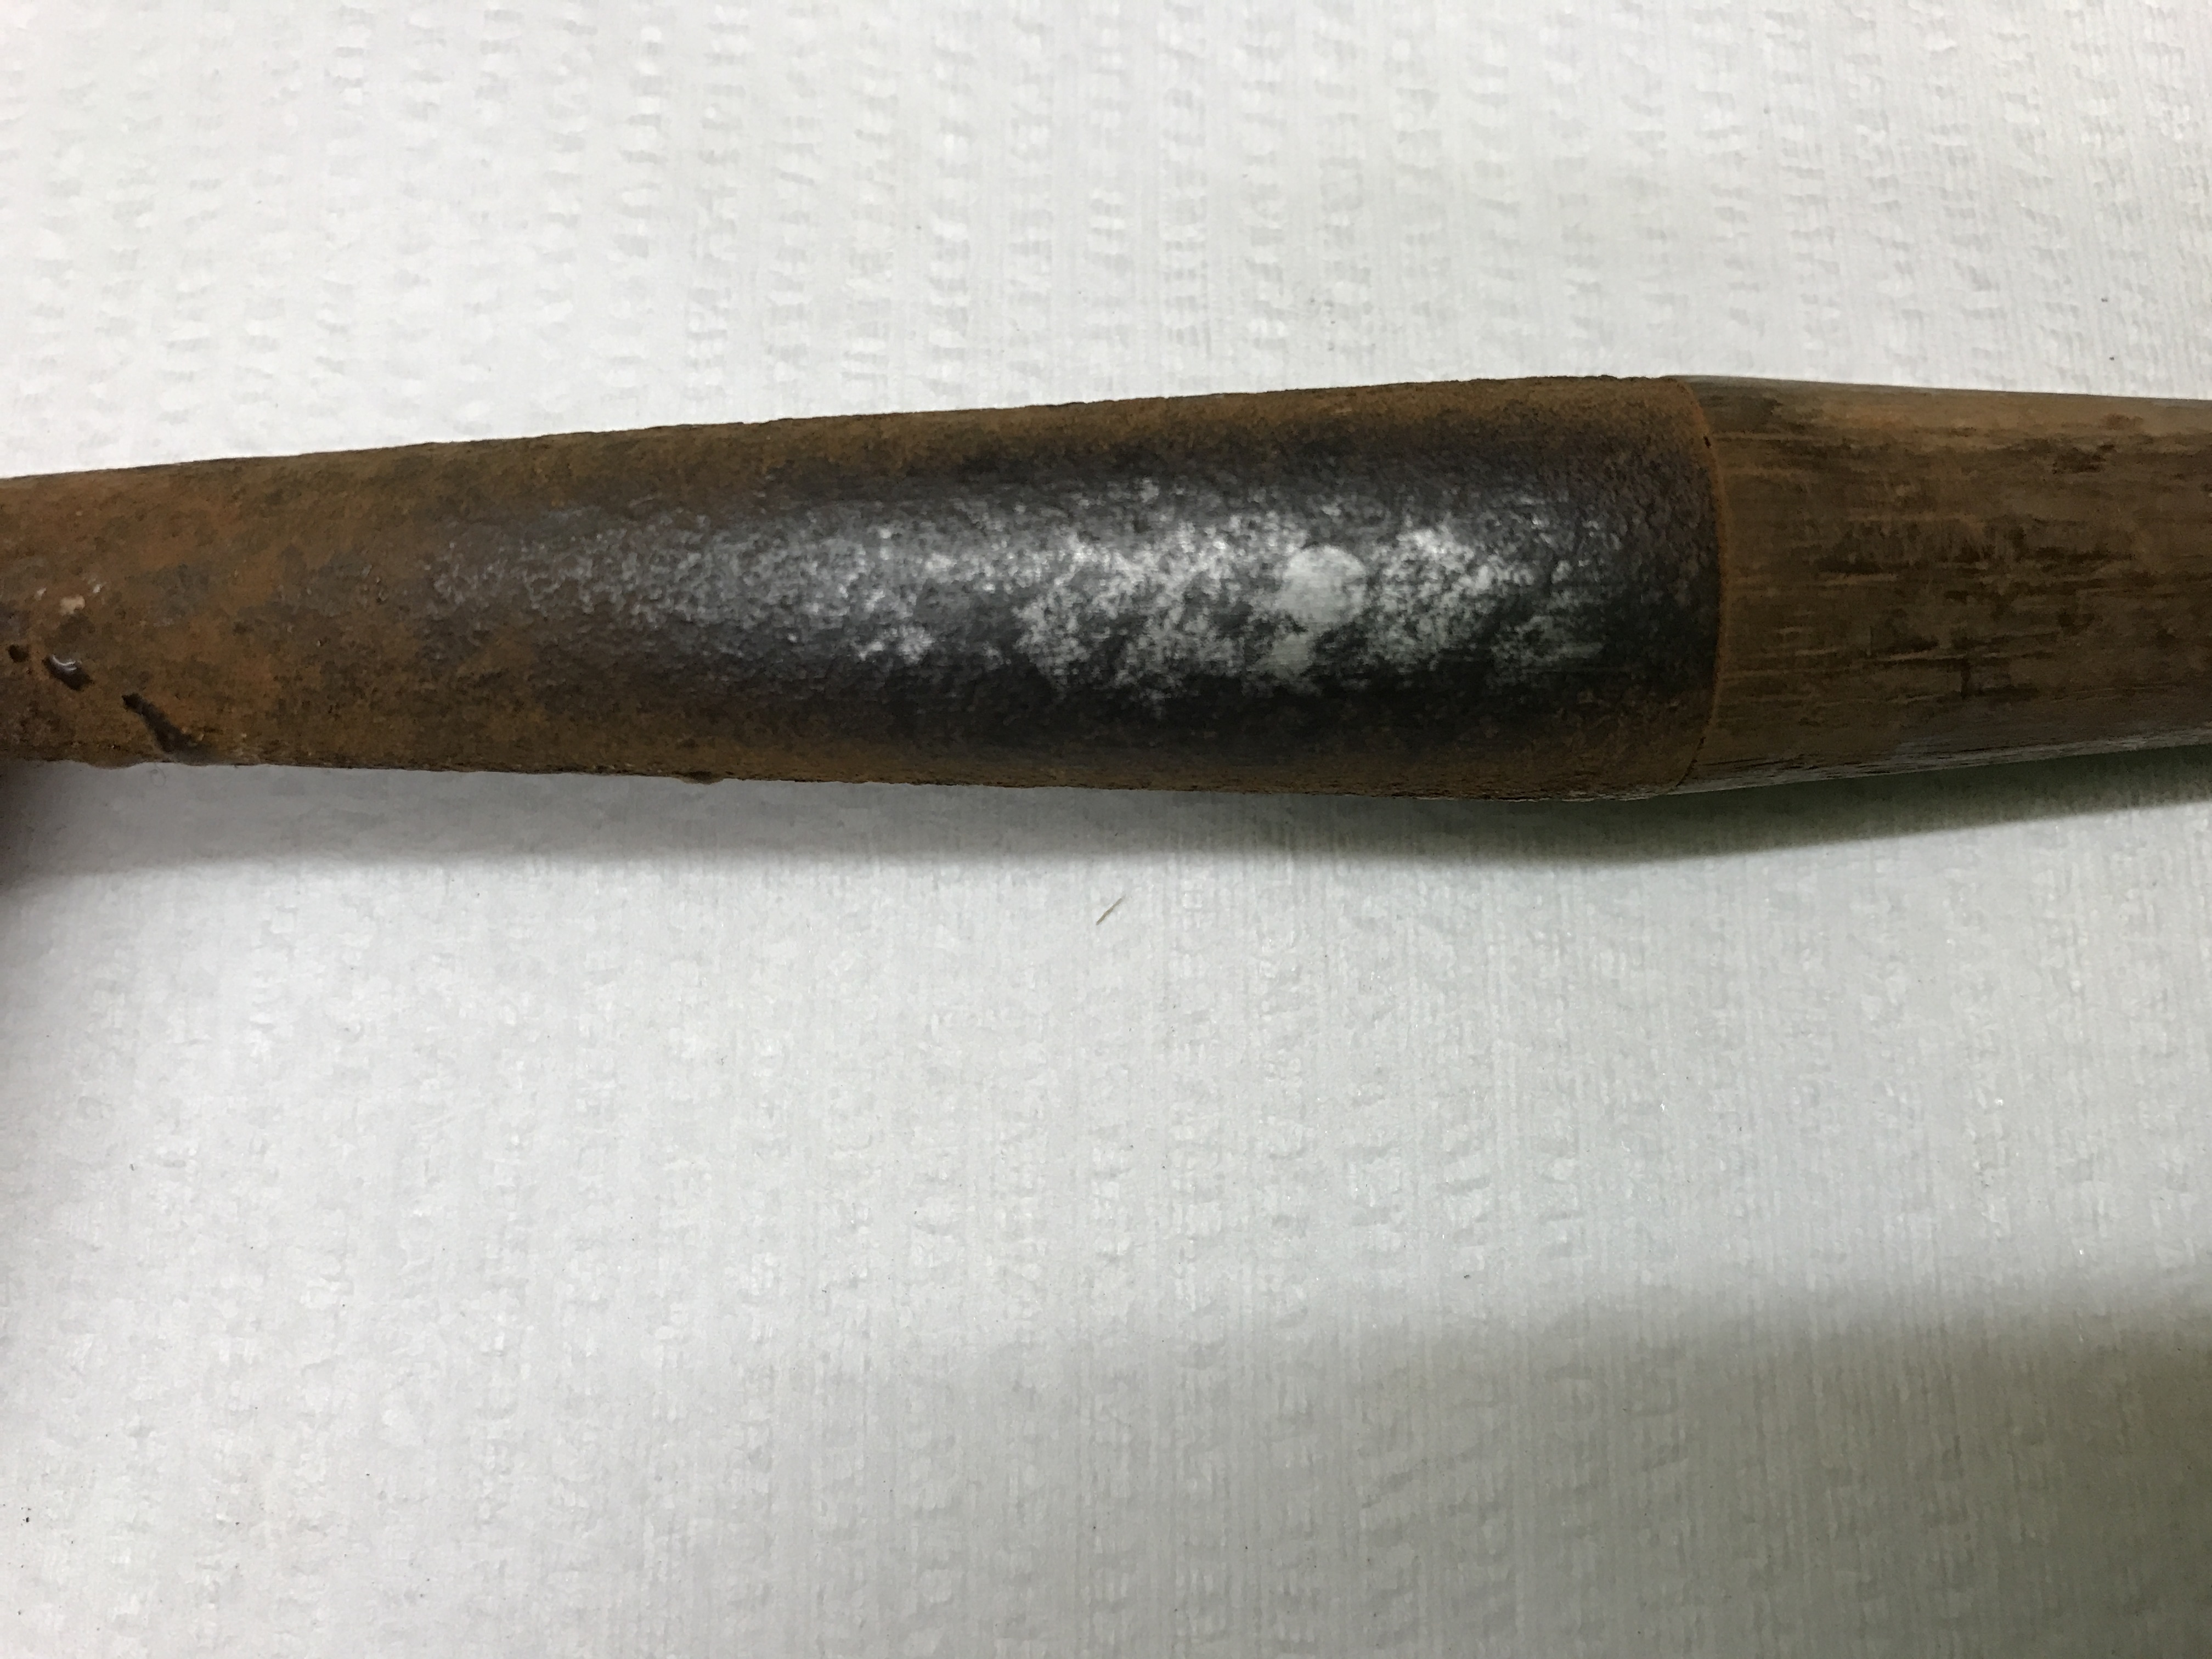
With the pin removed a lose head will often fall from the shaft. At times the head will need gentle persuasion and sometimes you will come across a head that is so firmly attached that you will wonder why you're re-pinning it in the first place. If the head doesn't come away easily a few taps around the hosel with a RUBBER mallet may be enough to break the seal and loosen it so that you can twist it off. Heating the club head with a heat gun for a few minutes will also help to loosen it. On occasion I will use the rubber mallet to dislodge a stubborn head. A sharp blow to the top of the blade, being careful to hit directly down parallel to the hosel will usually do the trick on even the most stubborn of heads. If the shaft is being re-used be very careful not to damage it with your enthusiasm to remove the head. It may take several attempts of heating and gentle tapping of the hosel before it loosens, patience is paramount here. If the shaft is damaged and not for re-use then you can be more aggressive with your removal strategy but be aware that getting the hosel section of the shaft out of a club after you've broken the shaft off requires extra work that you should be able to avoid.
If I can't get the head off and the shaft is for play then I simple re-pin as is and assume the fit is as good as it needs to be. This is not uncommon and makes the re-pinning task much easier. If the head does eventually loosen through play then it can be re-pinned at that stage.
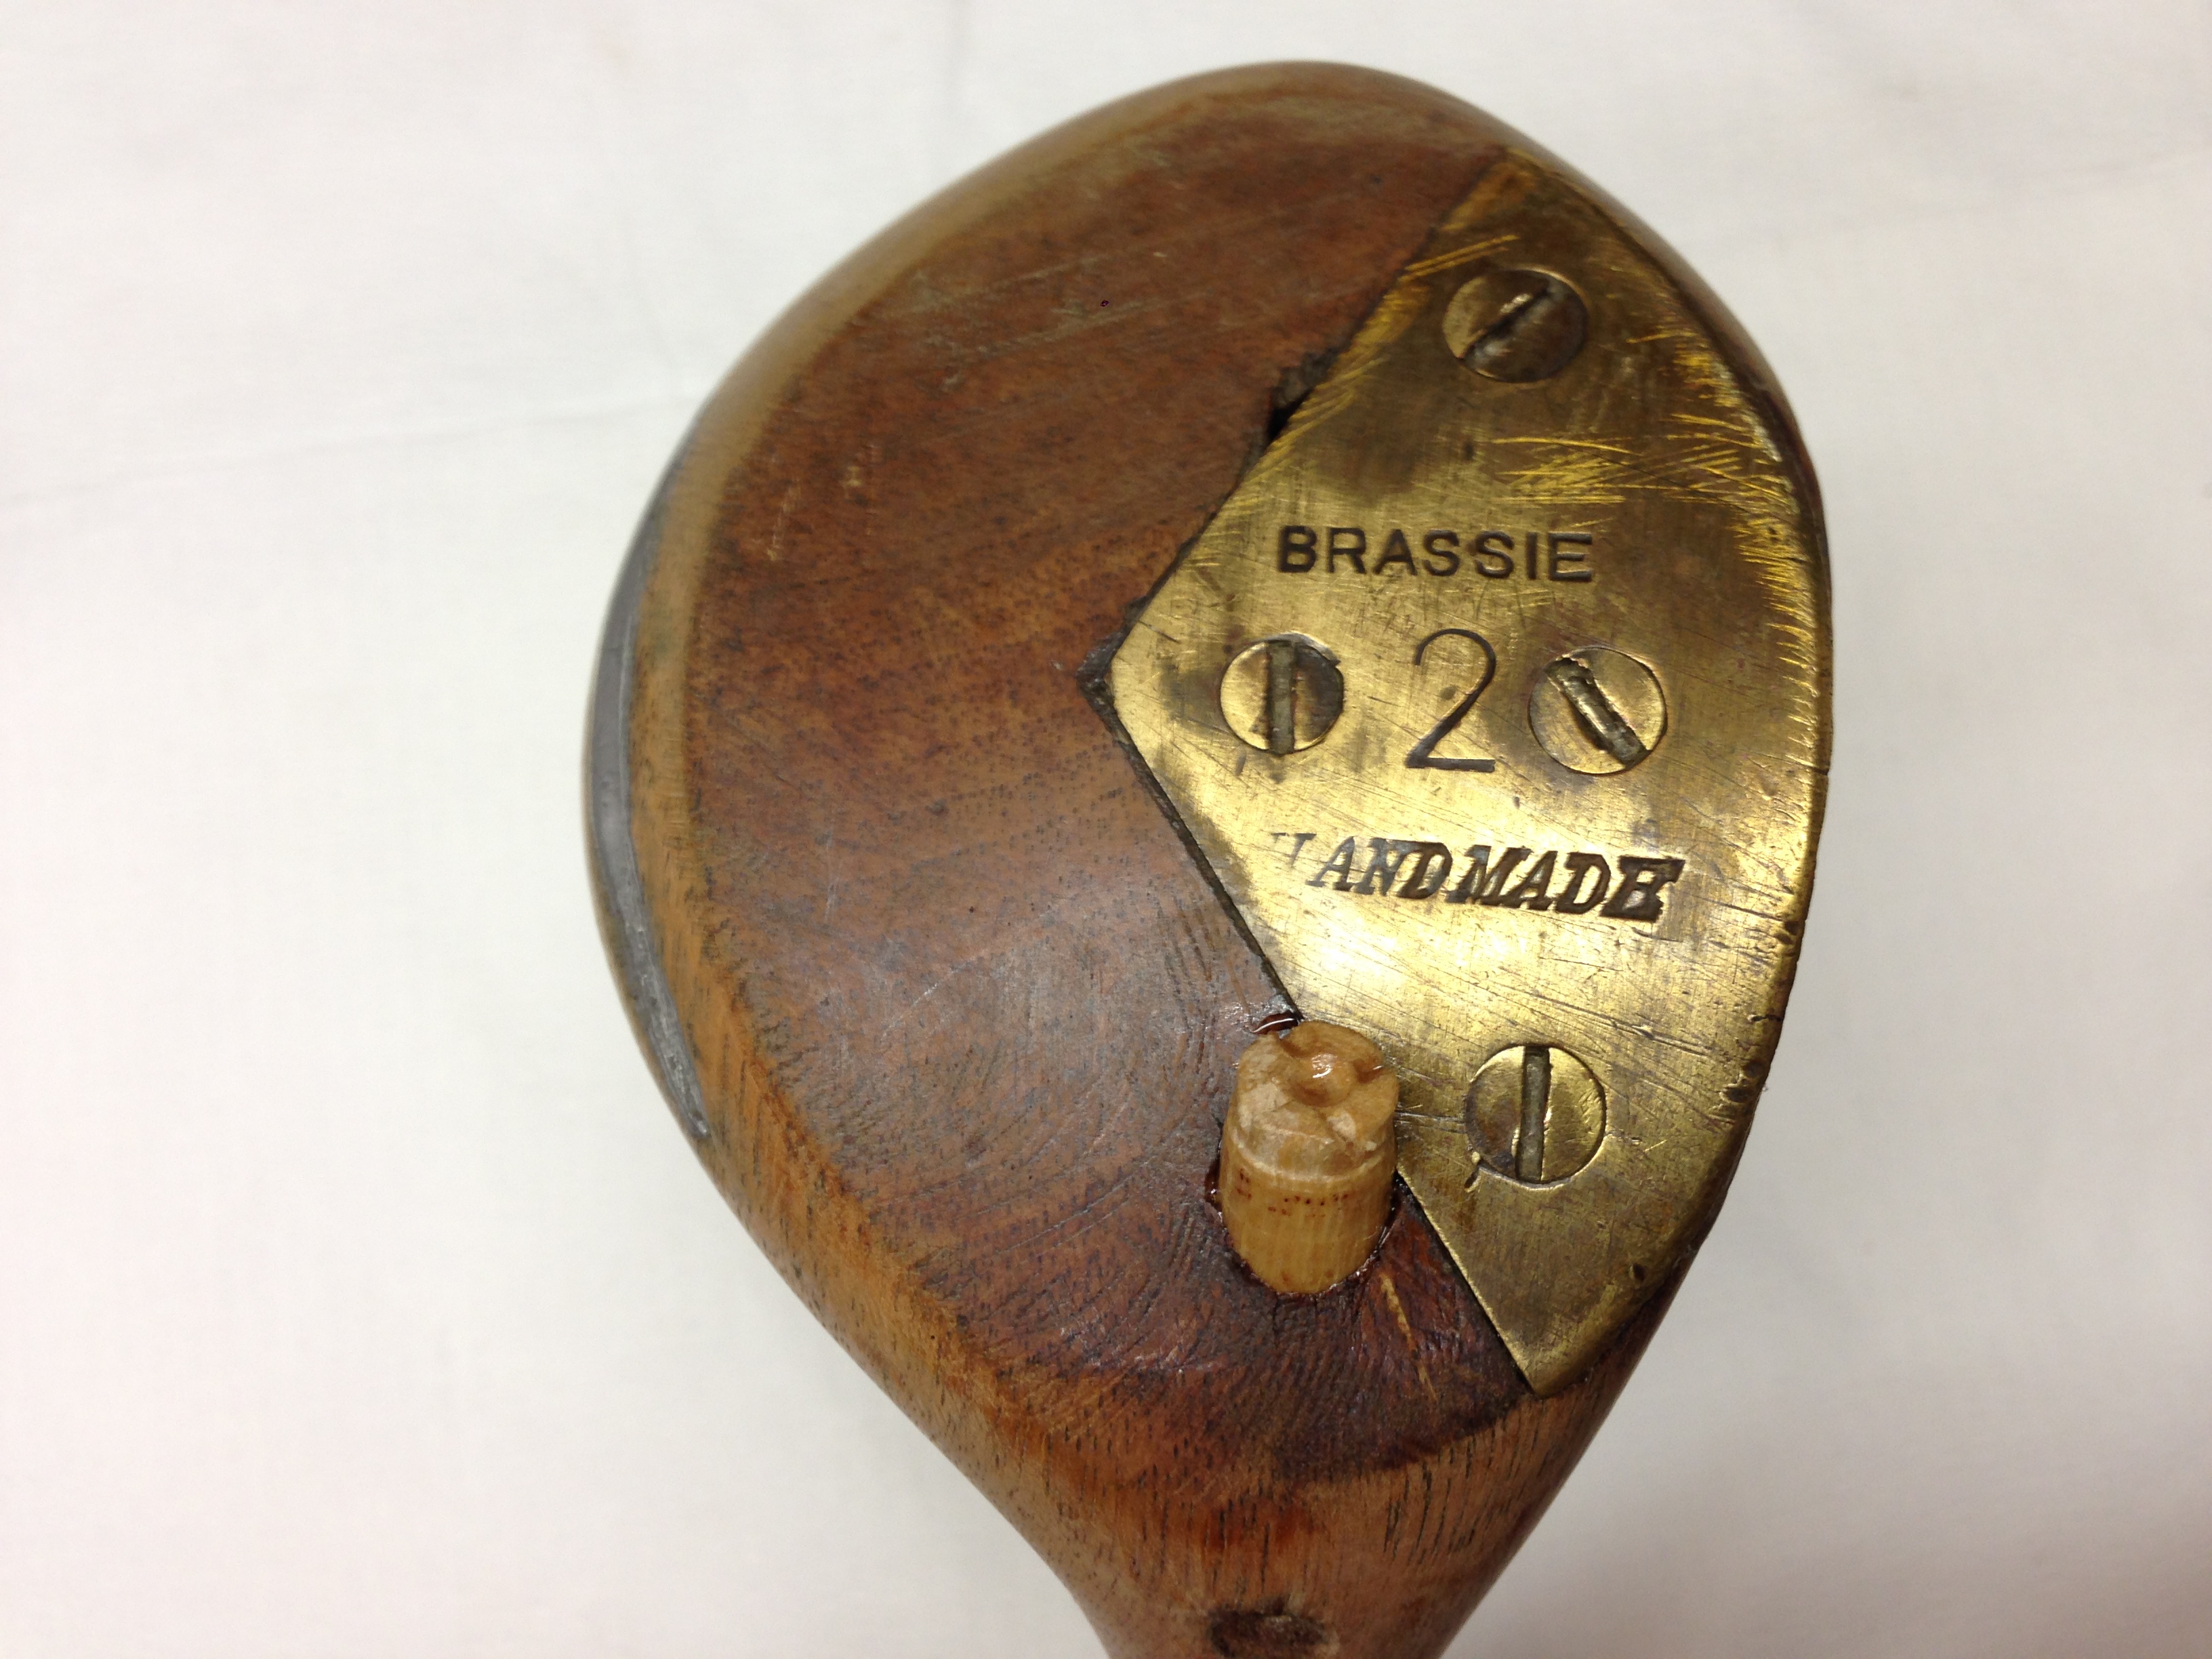
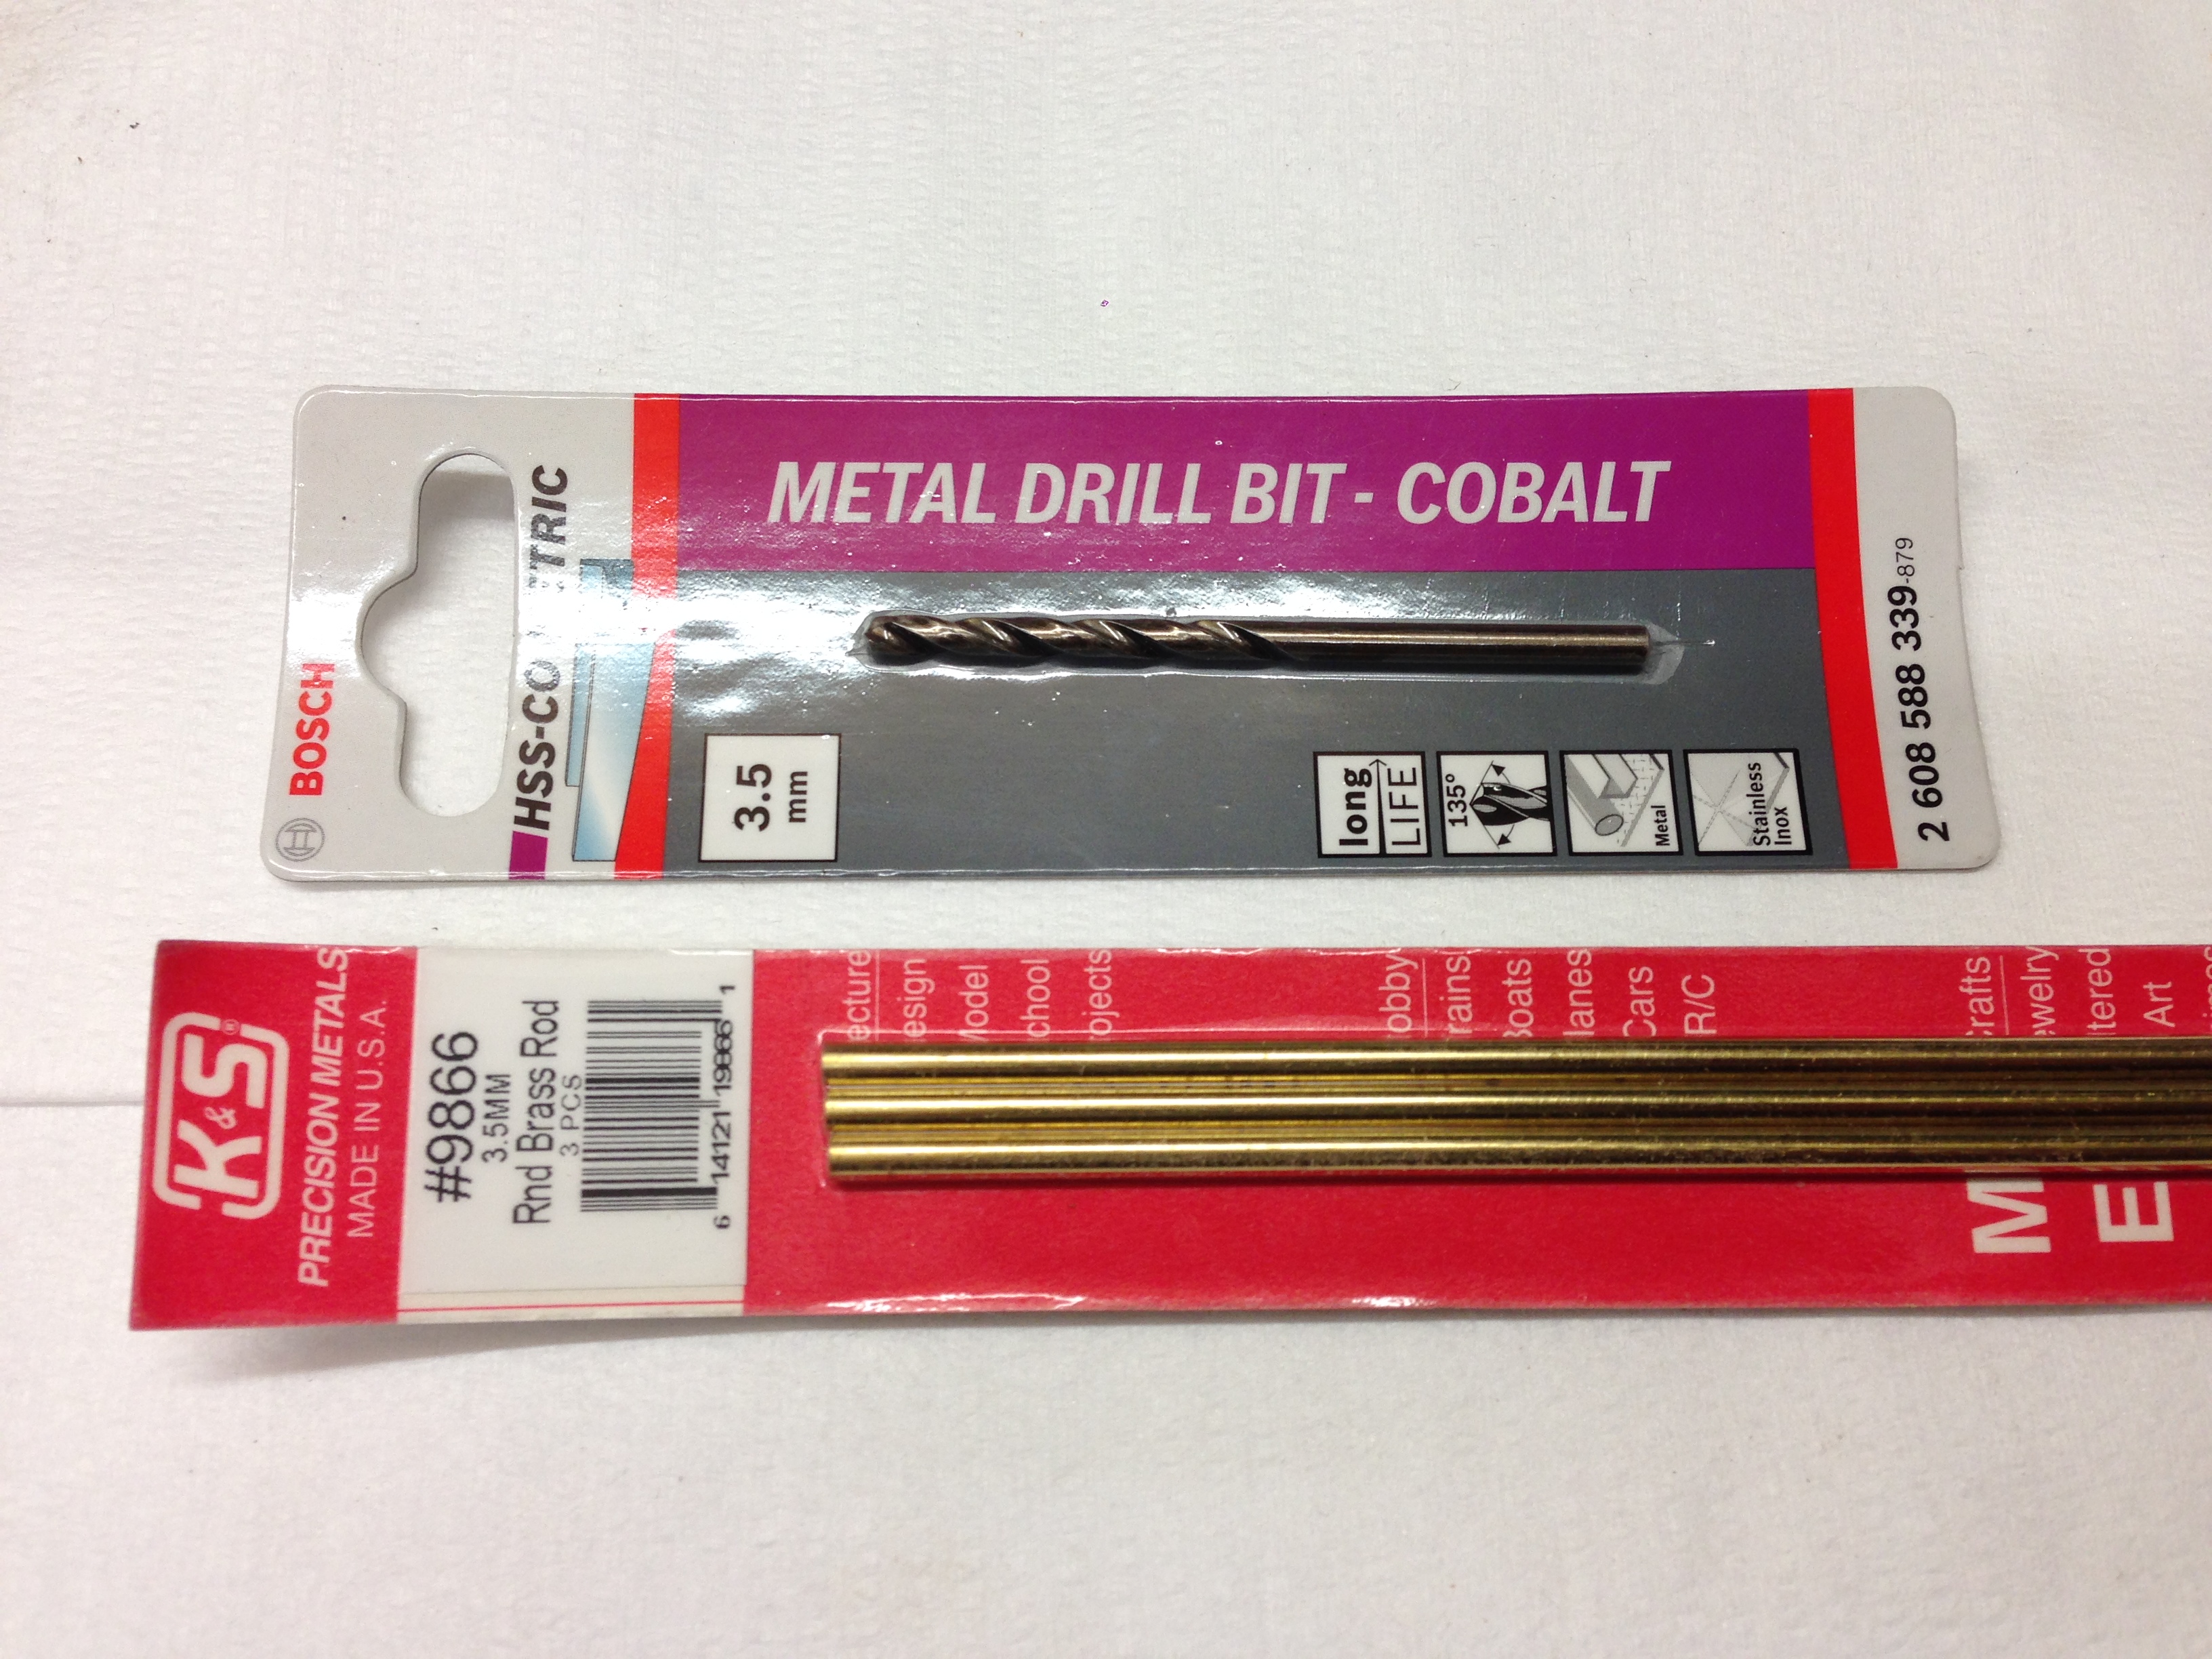
I re-drill ALL of my pin holes with a 3.5mm cobalt drill. I use the cobalt bits because they retain their edge longer especially when drilling through stainless steel heads, which are not uncommon. I use 3.5mm brass rod for ALL of my pins. I use this combination for several reasons:
- It ensures the hole and pin are an exact match
- The brass rods are easy to source from hobby shops and are relatively inexpensive (they are also available in non-metric sizes)
- The brass rod is easy to cut into short lengths (I use a pair of good quality pincers)
- The brass pin will always be easy to find for future maintenance.
- The brass is easy to file down

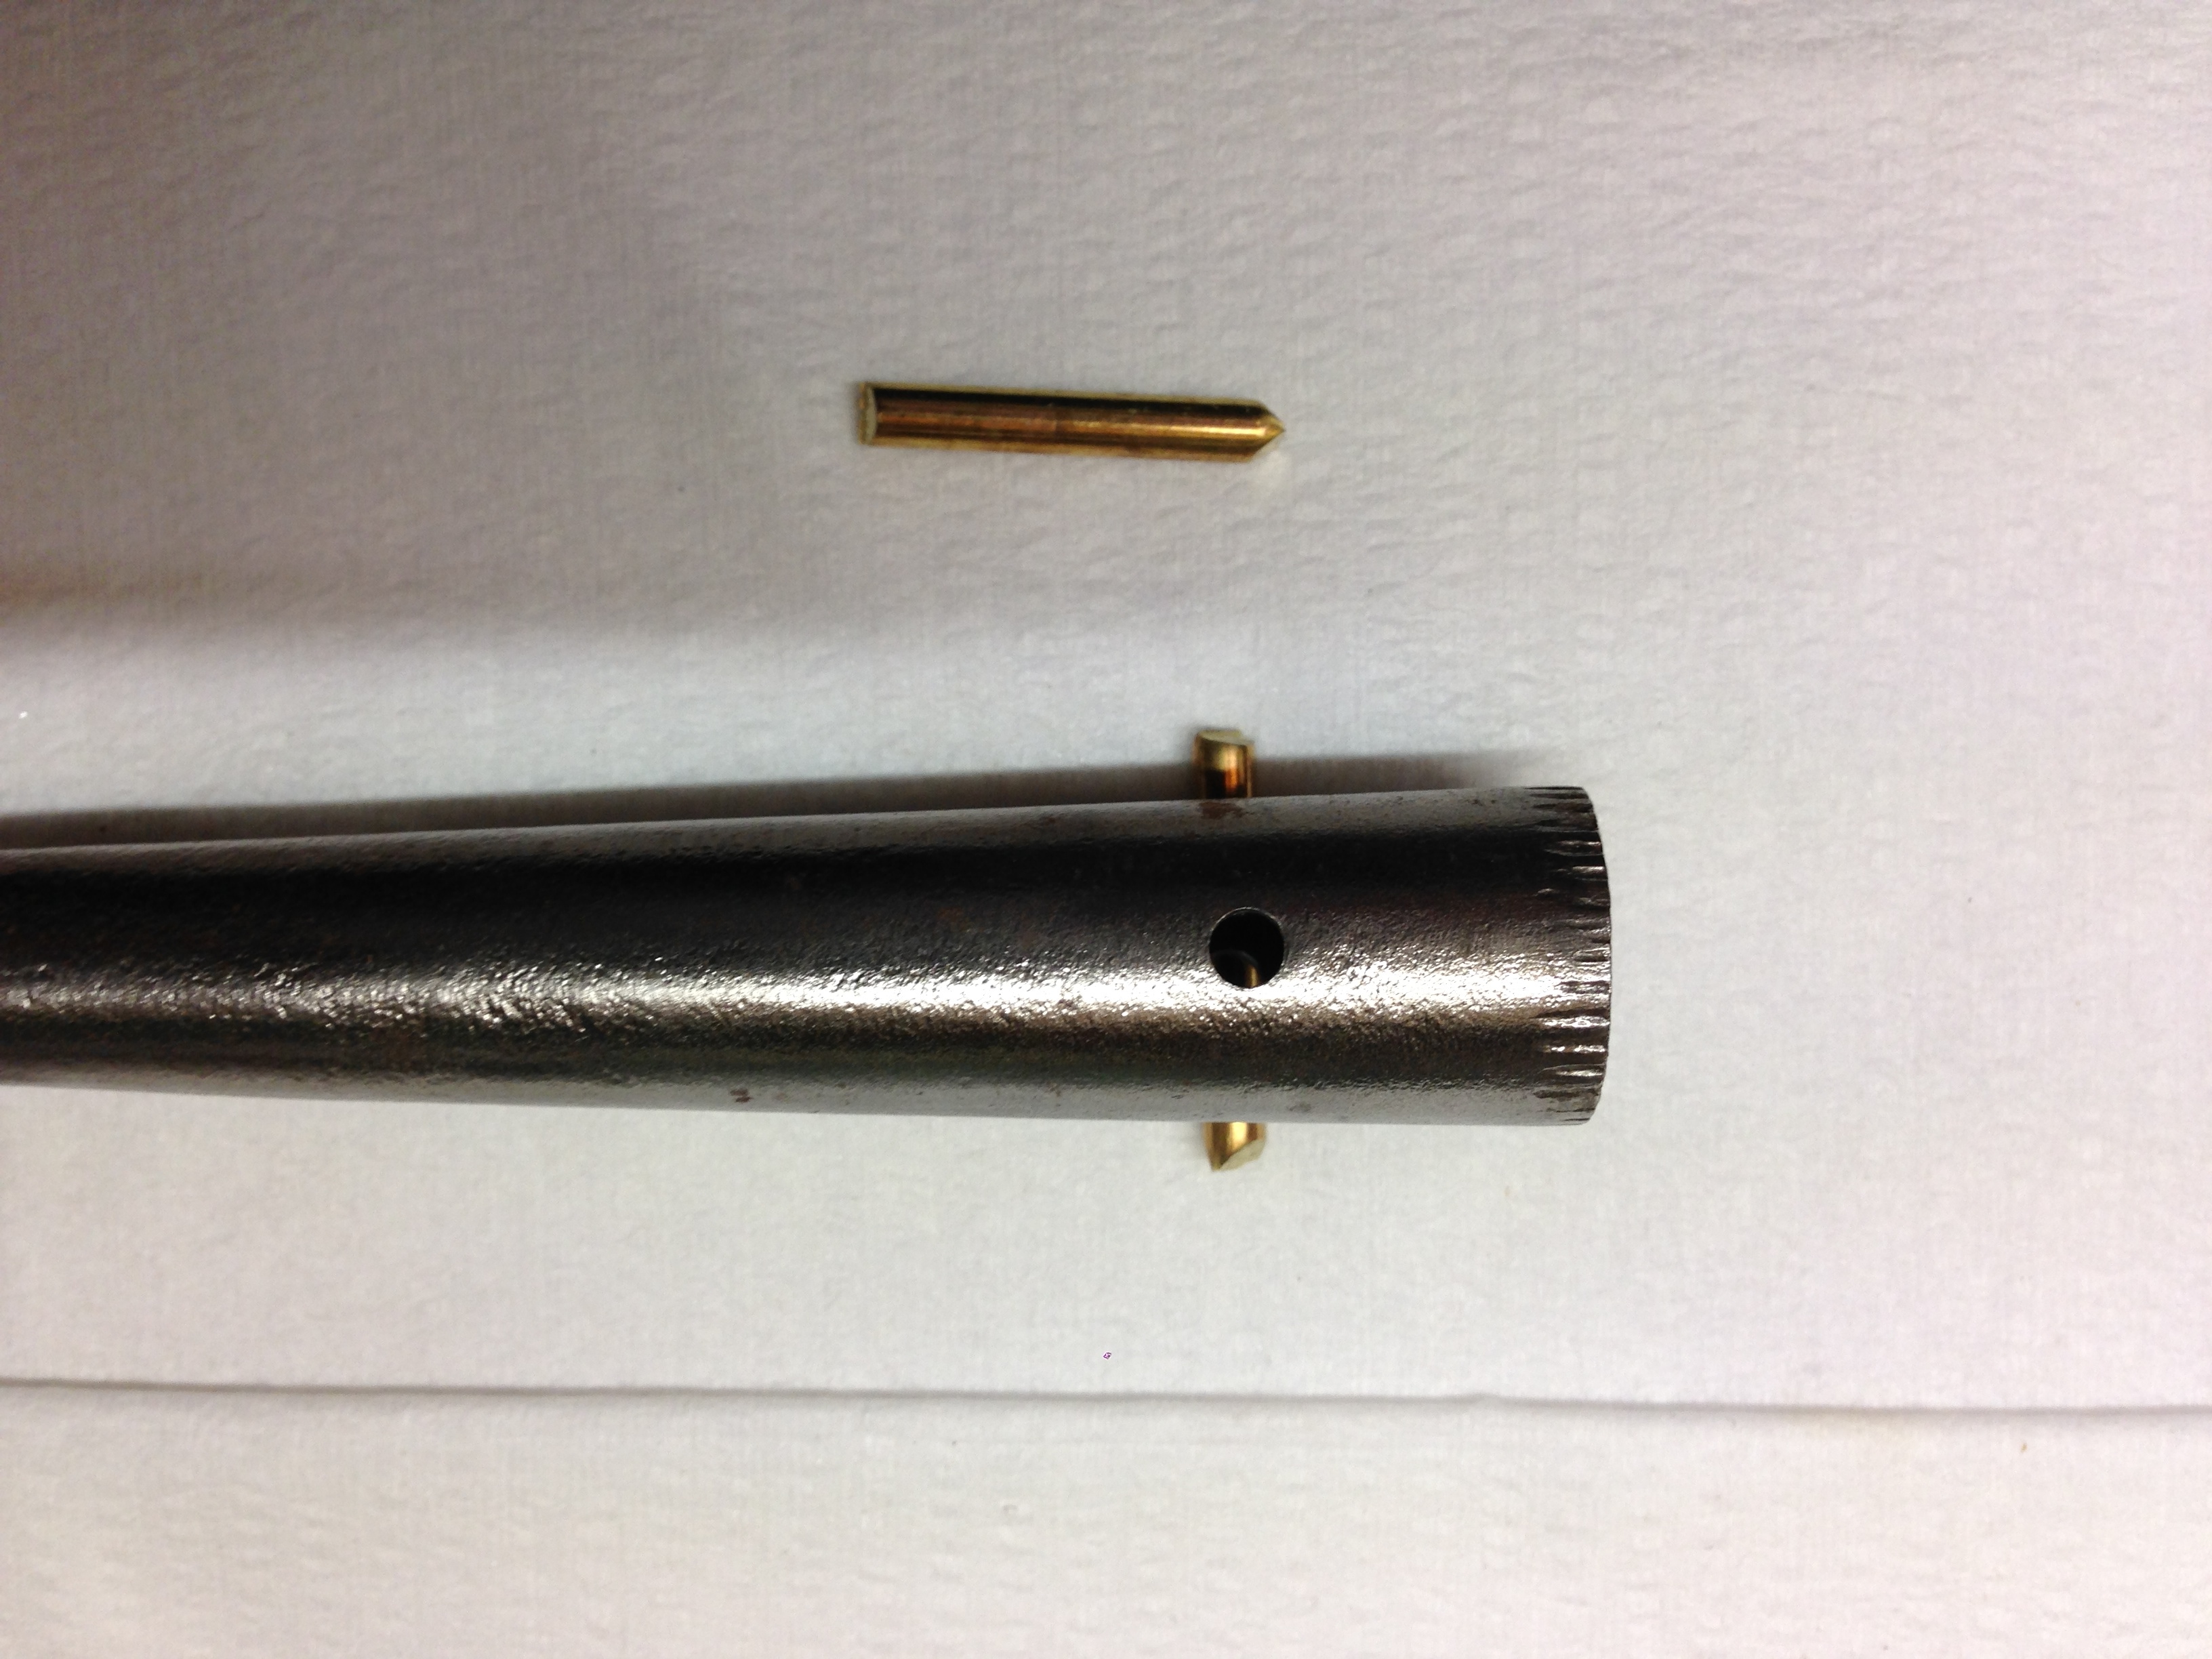
If I am re-pinning the original shaft I re-drill the hosel with the shaft in place so that the new hole aligns exactly through the hosel and shaft. When I'm using a new shaft I follow the same procedure except there is obviously no old pin hole in the shaft to guide the drill bit. Take great care when drilling the 3.5mm pin hole in a new shaft. Drill 1/2 way from both sides that way even if the hole doesn't align exactly in the middle of the shaft the difference will be filled with epoxy when you glue the pin in place. I then clean out the hosel and remove any built up "gunk" on the (old) shaft taper. I mark the correct alignment of the shaft with a small black dot on the hosel and on the hosel end of the shaft so that I know the correct orientation of the shaft in the club head. When you are gluing the shaft in place it can be difficult to align the club correctly with glue oozing out of the pin holes. To avoid mishaps I prefer a two step process, glue the head first and when dry insert and glue the pin.
I run a 3.2mm welding rod through the pin hole while the epoxy dries. REMEMBER to turn the rod several times while the glue starts to take and remove after 2-3 mins before the glue sets.
When the head is firmly glued in place I carefully run the 3.5mm drill back through the pin hole to remove any glue that has built up. DON'T FORGET TO DO THIS! Apply epoxy in the hole and carefully insert the brass pin making sure it protrudes beyond the hosel on both sides. The beauty of using pincers to cut the brass rod is that it leaves the ends pointed which makes it easier to get it started in the pin hole. The pin should tap through the hosel with a little resistance. If it is difficult to get through then you've probably forgotten to re-drill the hole after setting the head. Don't try and force it, pull the pin out and make sure the hole is re-drilled before progressing. When set I file and sand so that it is flush on both sides.
I always use rubber gloves when using epoxy and have plenty of rags available to wipe up excess glue.


3. How to straighten a warped shaft
You will need a heat gun, a pair of leather gloves and a good enough eye to sight along the shaft. The other piece of equipment I use is handy for many club related jobs and is especially handy when I need to straighten a bowed shaft. A piece of 150-200mm x 40-50mm pine approximately 750mm long with a 10-12mm channel cut out of the narrow edge. I will call it my "shaft holder thingy".
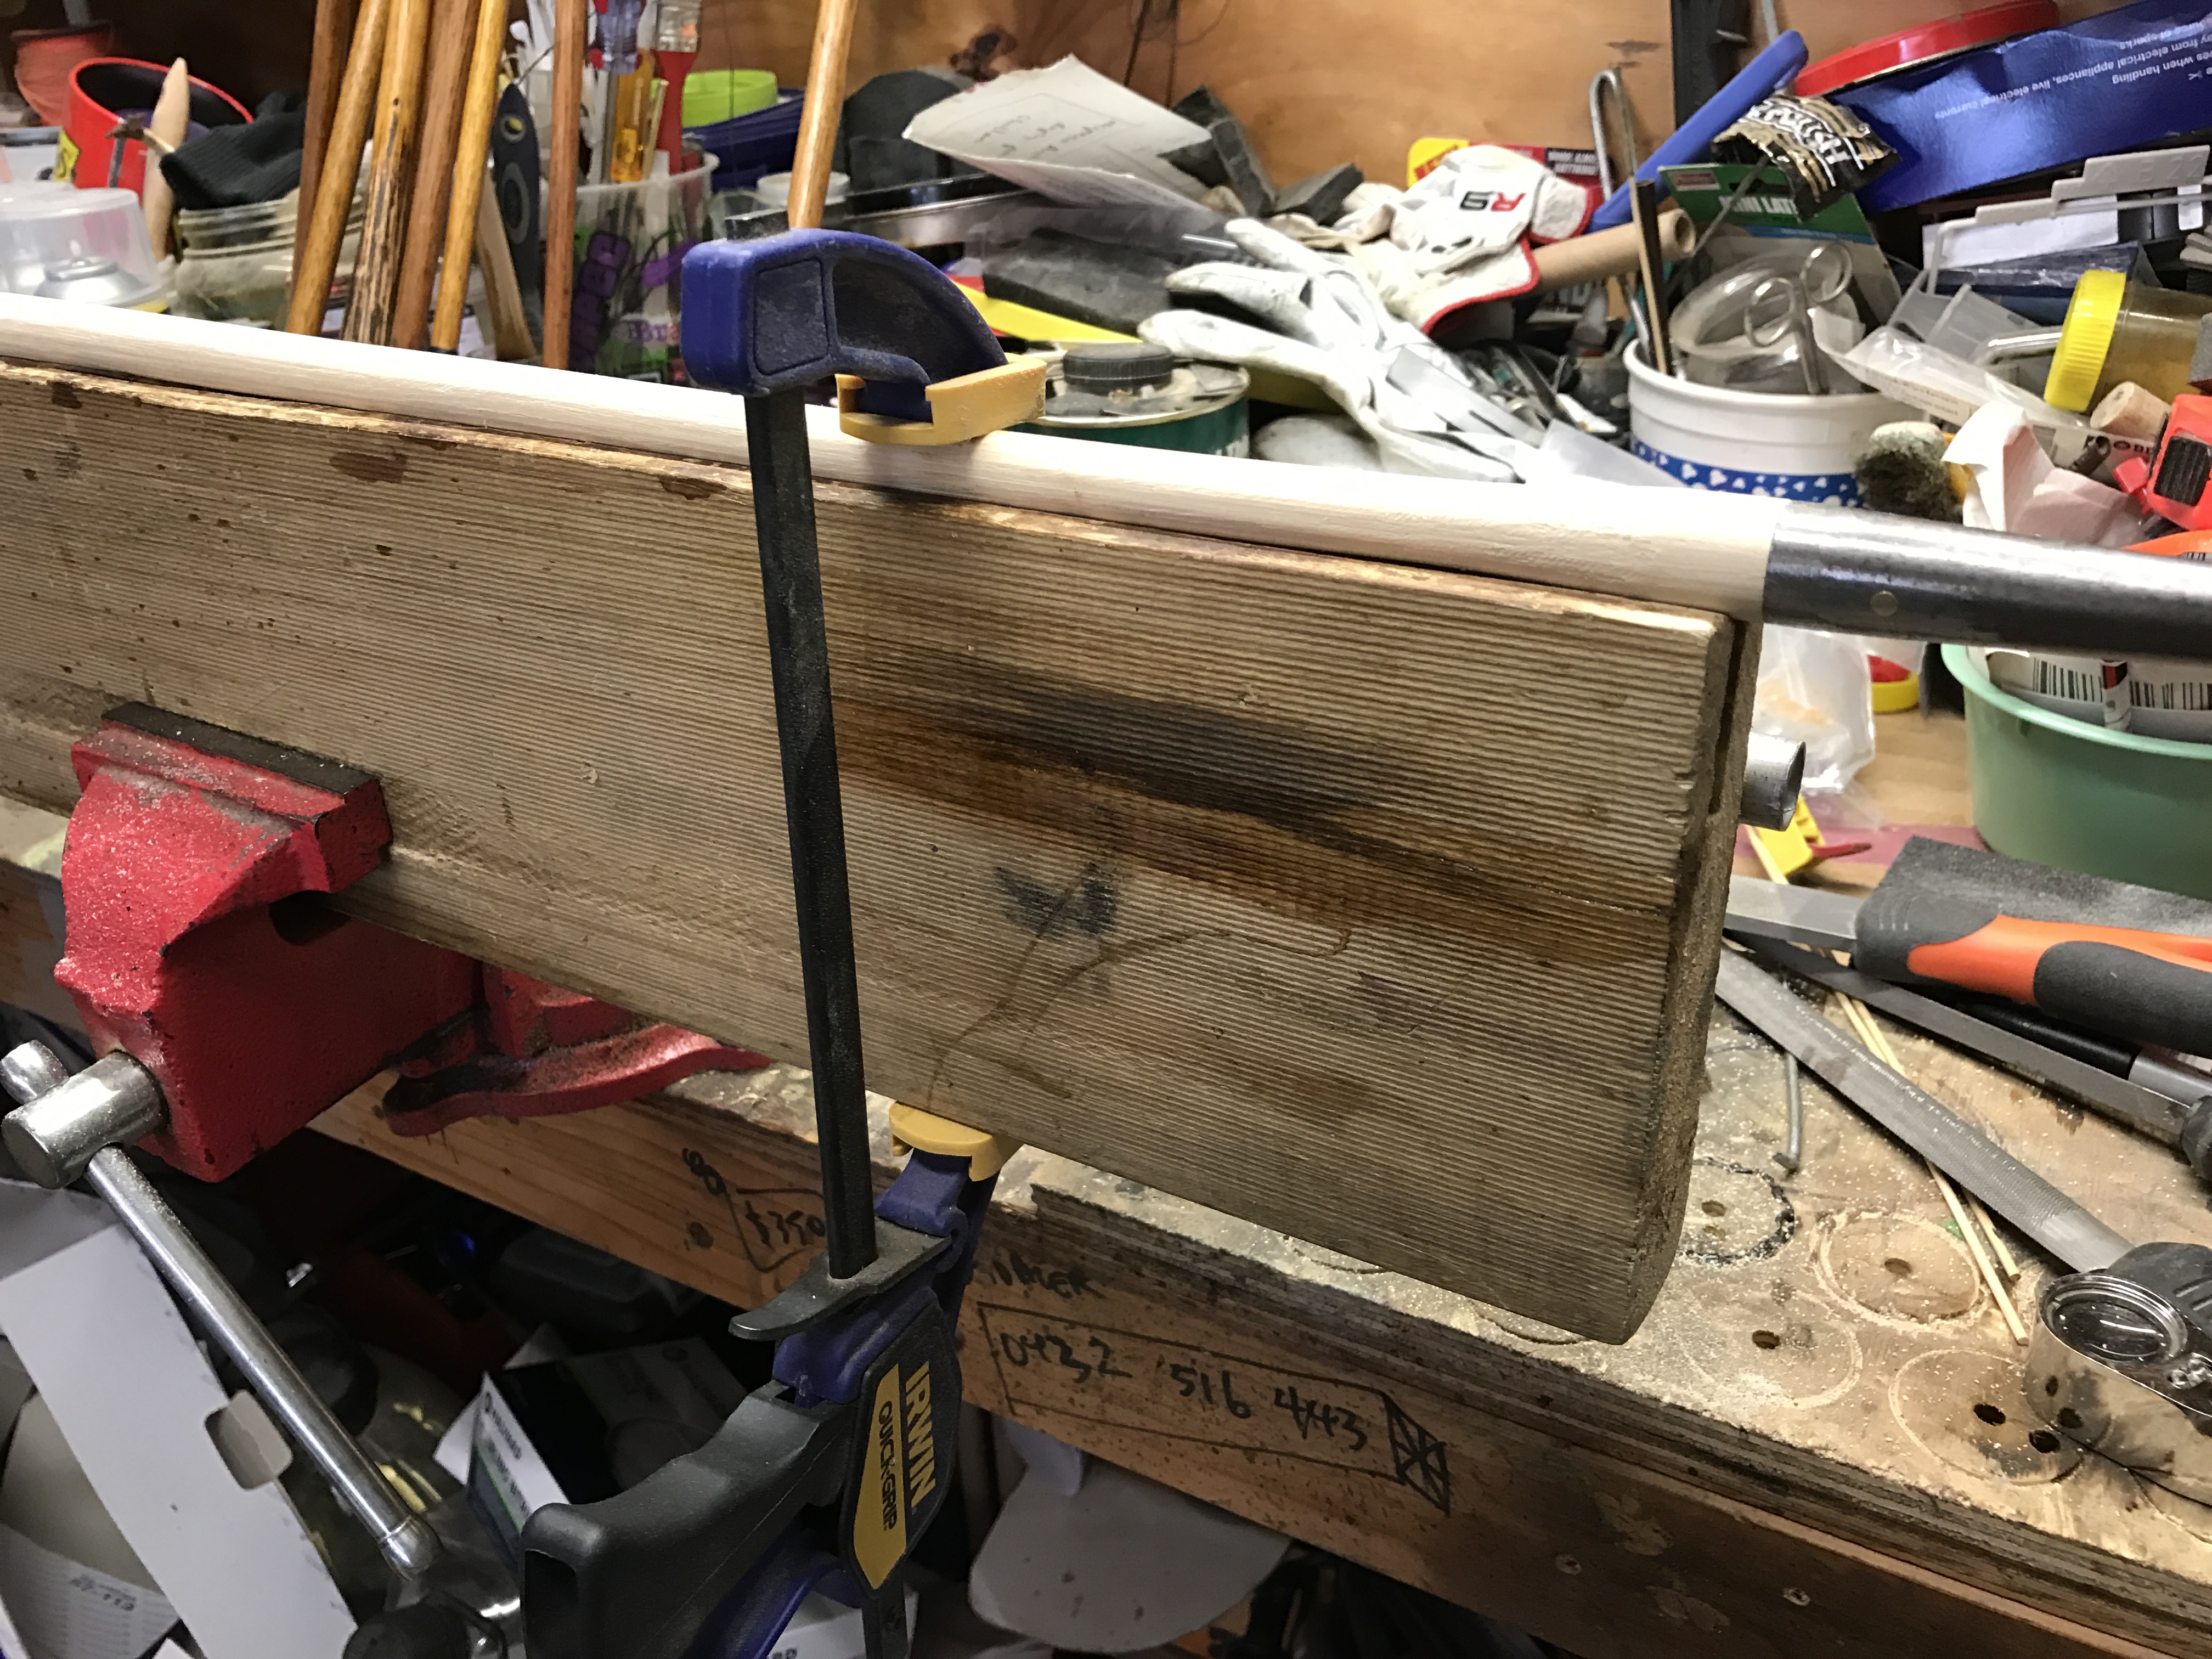
The channel in the edge of the holder allows the club to be orientated in any plane and lightly clamped in place to prevent it from moving. For correcting bends the straight edge of the timber will highlight the bowing in the shaft. I prefer to straighten shafts with the head and grips removed. Fortunately most of the clubs I have that need attention in this area are prepared that way. With the club laying in the groove, bowed side facing up, I run my heat gun back and forth steadily along the length of the entire shaft for 3-4 minutes being careful not to burn or darken the shaft. With the club in the groove of the holder and leather gloves on I use my left hand (I am right handed) to push down firmly, moving along through the bowed section while at the same time pulling up on the butt of the shaft with my right hand. Having the shaft fixed against the timber allows me to control the amount of leverage I apply and to what section of the shaft I apply it to. For example, if the last 300-400mm of the butt section of the shaft is bowed I can start applying pressure directly to that area with my left hand whilst pulling up with my right hand. The remainder of the shaft remains fixed against the straight edge and is not affected by the force being applied to the opposite end.
I have tried several different straightening methods and this is the technique that I find gives me the greatest control and best results. It can take a bit of practice but after you have straightened a few shafts you will get a "feel" for the amount of tension a club needs and will tolerate without risking damage. A hot shaft is very malleable and will bend and straighten quite readily. I have had the shaft of a wooden cleek heated to a point where I could rotate the head of the club 180 degrees with no damage to the shaft whatsoever (it remains in my bag today with the original shaft still in place working like a charm). If the shaft has multiple bends I correct the worst first, allow the club to cool and then address the next. Don't expect to be able to straighten every shaft perfectly, some have a mind of their own and you will have to be satisfied with the best you can do. This is one area of club repair that requires a certain amount of feel and one that you will get better at the more you do.